Cook Local, Eat Global
It’s Kimchi Time Again!
Yes.
The nights have become crisp and cool, and the autumn harvest of Napa cabbage has begun.
The Farmer’s Market is filled to bursting with locally grown goodness: garlic heads nearly as big as my palm, cayenne chilies longer than my hand, Japanese globe turnips, bok choy, Chinese bunching onions, crinkly violet and vibrant green mustard, juicy-crisp daikon radishes–it is a food lover’s paradise right now. These items, of course, are all in addition to the usual summer suspects which are still producing plenty of fruits: tomatoes, eggplants, summer squashes, sweet bell peppers, cucumbers, lettuces, green beans, sweet corn. Of course, that is not to mention the fruits, but the point is that while autumnal vegetables and fruits are definitely in evidence, with piles of hard-shelled winter squashes and pumpkins all over the place, and baskets of sweet potatoes and white potatoes, the summer vegetables are still going strong.
In fact, I think that September is probably one of the best months at the Athens Farmer’s Market, because the deep, rich soil of our county goes through a frenzy of fecundity, throwing out pound after pound of delicious produce with each passing day. Even the garden on my deck has thrown caution to the wind and is currently putting out more Thai chilies, Thai basil and bok choy than we can eat ourselves.
So what is there for us to do but preserve what we cannot eat now?
That is where kimchi comes in.
Kimchi is the Korean answer to the human need for fresh vegetables during the harsh winter months.
This national dish, or rather, type of dishes, is basically a mixture of vegetables and seasonings, often including huge amounts of chili peppers, which are then fermented by the process of lactic acid fermentation. This process, which is carried out by the naturally occurring lactobacillus bacteria (which live in the air and on the surface of vegetables), creates lactic acid from the sugars present in the vegetables. This results in a naturally bubbly, tangy food product that is beneficial to health in many ways. Scientists from around the world have found that lactic acid fermented foods may have anti-cancer properties, and Korean scientists recently found that kimchi may have anti-viral properties that were beneficial in treating bird influenza.
These possible health claims for kimchi aside, what is known about it is that it is low in calories, high in fiber, filled with vitamin C, beta carotene, iron and other beneficial nutrients. The exact nutritional profile depends on what ingredients are used to make the kimchi, so these statements are just generalizations.
It also tastes good, and makes other foods taste good too. I love it in noodle soup, and with beef or chicken. It is great in fried rice, too.
The first time I made kimchi was last April, and then I used seasonal local ingredients to great effect, including ramps (wild Appalachian garlic), radishes, Japanese globe turnips, mustard greens, and of course, the giant Napa cabbage that inspired the entire idea. (When you see a cabbage that is bigger than your baby, you just need to buy it and use it for something special. Well, at least, I have to, I don’t know about you.)
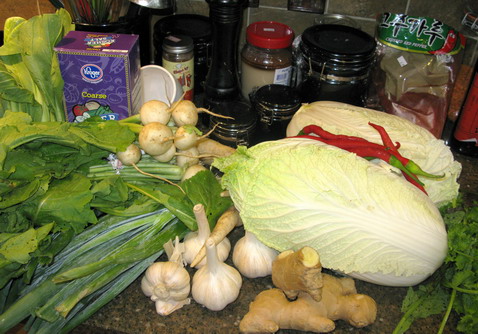
This time around, I ended up using three smaller Napa cabbages, two heads of bok choi, some Japanese globe turnip tops, mustard greens (I love the way mustard greens taste in kimchi), giant cayenne chilies, scallions or Chinese bunching onions, and huge heads of German extra hardy garlic. All of these ingredients were organically grown here in Athens county by the good folks at Shade River Farms, Haulin’ Hoof Farm, Green Edge Gardens/Athens Hills CSA, and Rich Gardens Organic Farm.
The very few non-local ingredients were the kosher salt, and the ginger, Korean chili flakes and fish sauce. The former I bought in at Kroger and the three latter ingredients came from our local Asian market. (And I must insist on using the Korean chili flakes–they add the proper flavor and color to the kimchi. And they are easily found in most Asian markets in cellophane packets. They are brilliant scarlet and very fragrant–you cannot miss them.)
How does this Athens Autumn Kimchi taste?
Well, truthfully, I have no idea. I have to wait three days before tasting it, to give the little lactobacillus guys a chance to do their stuff.
I promise to report back on the results.
But I suspect that it will not only taste like kimchi, but it will also have the flavor of this very special place–a small town in Appalachian Ohio, a place of clay soil and steep hills, winding rivers and streams and brilliant blue skies, country houses and rolling pastures dotted with grazing cattle, horses,sheep and goats.
I suspect it will taste like home.
Until then, here is the recipe I used, if you feel the need to gather up some of the early autumn harvest and make yourself a jar or two of kimchi to enjoy over the next few months. (Once it ferments after three days, you can start eating it, and it will stay at about that level of fermentation if you keep it in the fridge for around a month. I have kept mine longer, although it keeps fermenting the whole time you store it. The cold retards the process somewhat, but it doesn’t stop it. Some people don’t like the flavor of long-fermented kimchi, but I do, so I don’t mind that it keeps going and going and going, rather like the Energizer Bunny.)
Oh, one more thing–before you make this recipe, you might want to read my first post on making kimchi–“Up Close and Personal With Kimchi”–some of the photographs of the process may be helpful to you, as well as the general commentary.

Athens Autumn Kimchi
Ingredients:
8 pounds Napa cabbage
1 pound bok choy
1/2 pound turnip greens
1 1/4 cups plus 1 tablespoon kosher salt
3 heads garlic, peeled and sliced
4″ long chunk of fresh ginger 1″ thick, peeled and sliced
1 1/2 cups Korean ground red chiles
2 bunches scallions or Chinese bunching onions, trimmed, washed and sliced thinly (about a cup and a half)
1/2 pound fresh mustard greens, washed and sliced into 1/2″ wide ribbons
2-6 fresh red chilies, stemmed and quartered (this depends on how hot your chilis are, how big they are and how hot you want your kimchi to be)
2 pounds diakon radishes, peeled and cut into thin half-rounds
1/3 cup fish sauce (if you are a vegetarian, leave this out)
2 teaspoons raw or brown sugar
Method:
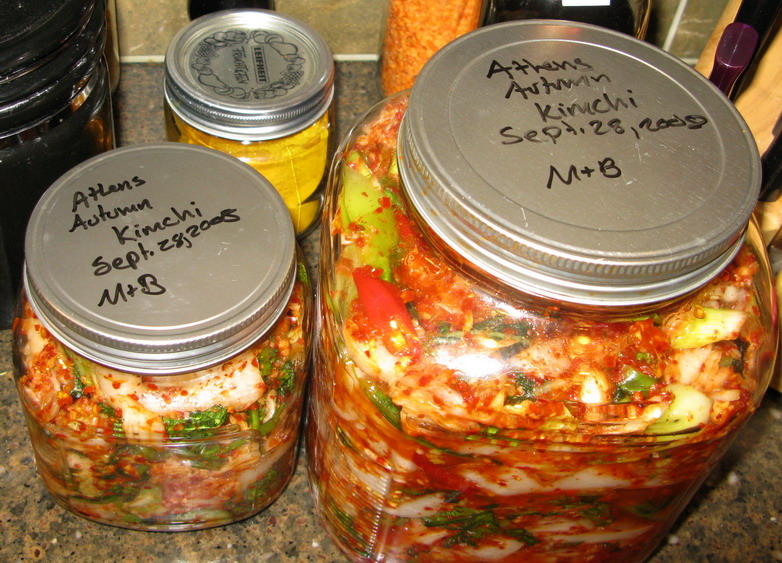
Fist, you need to gather your materials: you will need a one-gallon jar, and a one quart jar (I made enough so Morganna could take some back to the dorm with her) preferably glass, with a screw on lid or self-locking lid. Run them both through the dishwasher and make certain to put it through the heat dry cycle. Or, wash it well by hand, then pour boiling water over both the jars and the lids, then allow them to air dry. Also, you will need a very large bowl, crock, pot or basin and a large plastic bag. I used one of the giant Ziplock bags which are meant for storage of household items. It is tough enough to be rinsed out and used for later batches of kimchi, and it makes the periodic mixing of the cabbage during the brining process much easier.
You will also need a pair of latex gloves for yourself and any and all of your helpers. You do not want to get the chili oil on your hands when you mix the kimchi and pack it into the jars. It is pretty wicked stuff.
You will also want to scrub your sink out well with soap and rinse it well before you start.
Once all of this is accomplished, you can start making your kimchi.
First, cut off the root end of the Napa cabbages, and then strip away the tough outer leaves. Cut them in half longitudinally.
Then, making a v-shaped cut with your knife, cut the core of the cabbage, then pry it out with your fingers.
Then, depending on how dirty and bug-infested your cabbage may be, you can either wash each leaf individually before cutting them by spraying them under running water, and then setting them on paper towels to dry, or if the cabbages are pretty clean, like the ones this time were, you can fill your sink with cold water, and cut your cabbage leaves into two inch square pieces and dump them into the sink. Swish the pieces around with your hands, then pull them out to dry on a paper-towel lined countertop.

If you use the former method, cut the leaves into two inch square pieces -after- they are washed. It is easier to wash individual leaves when they are whole than after they are cut up.
Cut and wash the bok choy the same way as you did the cabbage. For the turnip greens, cut off the big stems and central veins, remove any yellowed bits and rinse well by either spraying or swishing. Once they are clean, cut them into 1″ wide ribbons.
The next step is salting the cabbage, bok choy and turnip greens.
Squeeze out as much washing water as you can by grabbing handsful of the greens and squishing them well. Dump two handsful of greens into the bag, then sprinkle with some of the one and a quarter cup of salt. Then reach in and squish the greens, rubbing the salt well into them. Continue this process of layering greens and salt, squishing and massaging with each layer.
When all of the greens have gone into the bag, and all of the one and a quarter cup of salt is used, seal up the bag. Give the greens a good shaking and squishing through the bag and then set aside for three hours. Every half hour or so, give the bag a good shake and a squish, making certain that the greens are covered by the juices coaxed from them by the salt. This brining process has two purposes. One is to remove excess water, and the other is to help kill bacteria that are not lactobacillus so that the fermentation can go on properly without the vegetables being attacked by microbes that cause them to rot instead of ferment.

While the greens sit in the brine, cut up your daikon, mustard greens (you may wonder why I don’t brine the mustard greens–it is because there isn’t as much water in them as there are in the other three greens) and scallions. Take your ginger and garlic slices and grind them up into a paste in a food processor.
After three hours have passed, it is time to drain and rinse the greens.
Dump them into a colander, and allow all of their juices to drain away. Then, squeeze out as much liquid with your hands as you can. Rinse under cold water, tossing the leaves as you go. Finally, squeeze out as much water as you can with your hands and put them into whatever mixing apparatus you have–a big bowl, crock, pot or basin.
Add all of the other ingredients to the greens, including that last tablespoon of salt, and put on your gloves. Now, the fun part begins.
Start mixing.
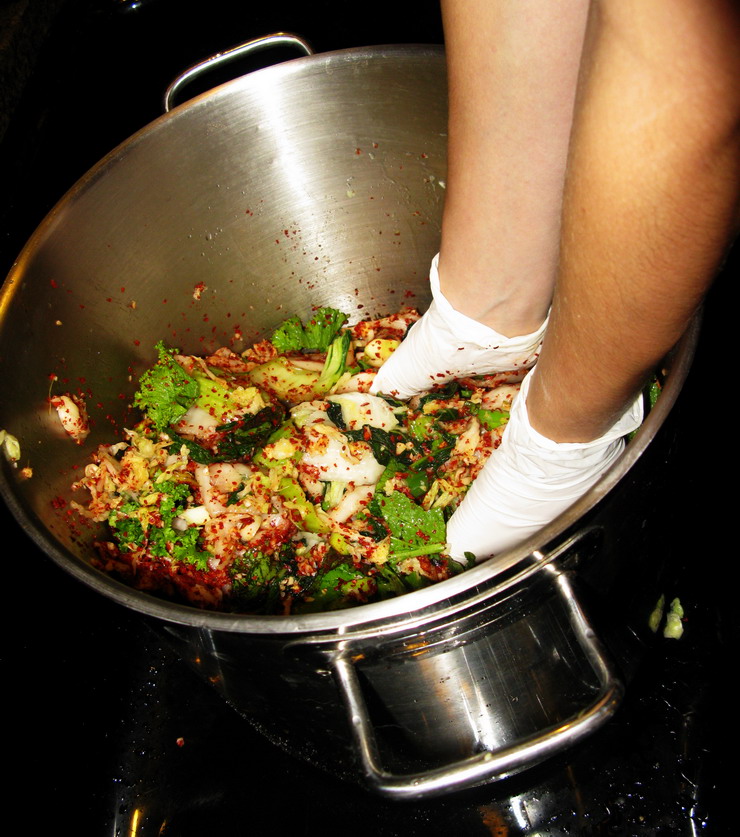
Squish, toss, turn, mix, fold, spindle and mutilate your ingredients in your mixing bowl. (We used our big stockpot set down in the sink for this job–it contains the ingredients really well.) Massage the stuff well into each other, making sure some of everything gets into some of everything else.
After everything is well blended, start packing the kimchi into your very clean and dry jars.
You don’t have to pack everything down tightly so that there is no air in the jar, you just have to tamp everything down gently with the back of your hand.
When the jars are filled, screw the lids on loosely and set into a cool, dark place at room temperature for three days to allow the fermentation to begin.
You will see bubbles fizzing up to the top of the jars as the fermentation process goes along–that is how you know that everything is working properly.
After three days, you can open and taste your kimchi. After that, refrigerate it for storage.
6 Comments
RSS feed for comments on this post.
Sorry, the comment form is closed at this time.

Categories:
- Admin (rss) (55)
- Blogs and Blogging (rss) (81)
- Book Reviews: Cookbooks (rss) (43)
- Book Reviews: Non-Cookbook Food Books (rss) (38)
- Cats and Cat Blogging (rss) (47)
- Chinese Cooking Lessons (rss) (32)
- Culinary School Stories (rss) (18)
- Dairy Pruducts: Cultured and Barbaric (rss) (4)
- Documentary Filmmaking (rss) (1)
- Essays, Rants and Reflections (rss) (260)
- Fighting Hunger (rss) (12)
- Food and Kids (rss) (45)
- Food in the News (rss) (126)
- Food Media (rss) (98)
- Food Preservation (rss) (18)
- Food Safety (rss) (45)
- Gardening (rss) (30)
- Herbs and Herb Blogging (rss) (20)
- Holidays (rss) (50)
- Kat Blogging (rss) (22)
- Kitchen Science (rss) (36)
- Leftover Makeover (rss) (8)
- Life, the Universe and Everything (rss) (131)
- Local and Sustainable (rss) (227)
- Local Athens Food and Foodies (rss) (42)
- Meatless Mondays (rss) (32)
- Menu For Hope (rss) (5)
- Nutrition, Diet and Health (rss) (84)
- On The Farm (rss) (8)
- Recipes: Almost Vegetarian, Vegetarian and Vegan (rss) (294)
- Recipes: American Regional (rss) (37)
- Recipes: Appalachian Hillbilly (rss) (33)
- Recipes: Bread, Pasta, Grains (rss) (95)
- Recipes: Canning and Preserving (rss) (8)
- Recipes: Chinese (rss) (123)
- Recipes: Comfort Food (rss) (120)
- Recipes: Cookies (rss) (16)
- Recipes: Desserts (rss) (48)
- Recipes: French (rss) (25)
- Recipes: Fruits and Vegetables (rss) (302)
- Recipes: Greek, North African and Middle Eastern (rss) (31)
- Recipes: Indian (rss) (137)
- Recipes: Italian (rss) (42)
- Recipes: Japanese (rss) (7)
- Recipes: Jewish (rss) (4)
- Recipes: Korean (rss) (6)
- Recipes: Meat, Poultry and Fish (rss) (220)
- Recipes: Mexican/Native American/ Latin American/Caribb (rss) (27)
- Recipes: Original (rss) (108)
- Recipes: Thai (rss) (27)
- Recipes: Tofu (rss) (17)
- Recipes: US Regional (rss) (16)
- Recipes: Vietnamese (rss) (8)
- Restaurant Stories (rss) (28)
- Sewing, Quilting, Arts and Crafts (rss) (16)
- Simple Chinese Recipes (rss) (30)
- Slow Food and Heritage Foods (rss) (10)
- Spice Blogging (rss) (44)
- The Chinese Cookbook Project (rss) (14)
- The Chinese Pantry (rss) (39)
- The Documentary (rss) (2)
- The Kitchen Saga (rss) (17)
- The Locavore's Bookshelf (rss) (15)
- The Unsung Adventures of The Culinary Nerd (rss) (6)
- Tools and Toys (rss) (35)
- Uncategorized (rss) (10)
- With a Side of Politics (rss) (48)
Archives:
- August 2012 (9)
- July 2012 (12)
- September 2011 (3)
- August 2011 (7)
- July 2011 (8)
- June 2011 (16)
- May 2011 (17)
- April 2011 (11)
- December 2010 (9)
- November 2010 (5)
- February 2010 (1)
- December 2009 (5)
- November 2009 (7)
- October 2009 (10)
- September 2009 (16)
- August 2009 (14)
- July 2009 (14)
- June 2009 (7)
- May 2009 (17)
- April 2009 (10)
- March 2009 (25)
- February 2009 (13)
- January 2009 (10)
- December 2008 (5)
- November 2008 (5)
- October 2008 (6)
- September 2008 (13)
- August 2008 (8)
- July 2008 (11)
- June 2008 (18)
- May 2008 (13)
- April 2008 (14)
- March 2008 (16)
- February 2008 (17)
- January 2008 (19)
- December 2007 (25)
- November 2007 (18)
- October 2007 (24)
- September 2007 (16)
- August 2007 (15)
- July 2007 (15)
- June 2007 (10)
- May 2007 (14)
- April 2007 (16)
- March 2007 (17)
- February 2007 (20)
- January 2007 (13)
- November 2006 (1)
- October 2006 (8)
- September 2006 (14)
- August 2006 (25)
- July 2006 (30)
- June 2006 (28)
- May 2006 (34)
- April 2006 (29)
- March 2006 (24)
- February 2006 (30)
- January 2006 (38)
- December 2005 (40)
- November 2005 (37)
- October 2005 (32)
- September 2005 (25)
- August 2005 (30)
- July 2005 (28)
- June 2005 (21)
- May 2005 (8)
- April 2005 (22)
- March 2005 (17)
- February 2005 (29)
- January 2005 (10)
Search Site:
Links:
- Lily’s Wai Sek Hong
- 101 Cookbooks
- A cat in the kitchen
- A Veggie Venture
- Accidental Hedonist
- Cha Xiu Bao
- chez pim
- Chocolate & Zucchini
- Chopstick Cinema
- Chowhound.com
- Chubby Hubby
- Cook sister!
- Cooking with Amy
- da*xiang
- Eat Local Challenge
- Eating Liberally
- Ecocentric
- Eggbeater
- Epicurious
- Farmgirl Fare
- Fatfree Vegan
- Foodgoat
- ForkandBottle.com
- Green Olive Tree
- Hooked on Heat
- Jaden’s Steamy Kitchen
- Kalyn’s Kitchen
- Lucullian delights
- Mahanandi
- Matt Bites
- MeatHenge
- mmm-yoso!!!
- New York Times – Dining & Wine
- Pizza Goon
- Rasa Malaysia
- Ruhlman
- Sailu's Kitchen
- Serious Eats
- SF Gate: Food & Dining
- Simply Recipes
- Soul Fusion Kitchen
- Tastespotting
- The Amateur Gourmet
- The Cleaner Plate Club
- The Food Section
- The Grub Report
- thecookscottage
- U.S. Food Policy
- Wandering Chopsticks
- Washington Post Food and Dining
- Wasted Food
Meta:

Powered by WordPress. Graphics by Zak Kramer.
Design update by Daniel Trout.
Entries and comments feeds.
sounds yummy! Maybe I will make smaller jars for X-mas gifts. Is 3 days fermentation standard?
and, will you update food porn LJ and let us know how it tastes???
Comment by madamestrange — September 29, 2008 #
Have you ever tried kohlrabi in kimchi? I have recently got hooked on kohlrabi. I slice it, then salt it, let it set a bit, later drain the fluids, then I add sesame oil, lots of garlic, crushed dried red pepper, and a little bit of soy sauce (& sometimes a bit of sugar). I let it set for a few hours.
Comment by JoAnn — September 29, 2008 #
What is the brand of of stockpot you are using in the picture above. I love the fact it doesn’t have rivets or screws on the inside? Thanks.
Comment by moh2014 — September 29, 2008 #
This is a silly comment, but on first glance, I thought you were mashing the kimchi with your feet (like wine)!
Comment by Esther — September 30, 2008 #
what kind of fish sauce do you use for the kimchi?
Comment by Erica — September 30, 2008 #
I’ve been making & selling my own Kim Chi for a few years. Your recipe is unique for sure! I just go traditional. Napa cabbage, Daikon, Green onions, Garlic, Ginger, Fresh chilis (anywhere from jalapenos to habaneros)Fish sauce sometimes. My question to you is how do you possibly get 8#. of cabbage into a gallon jar? *I even soak two heads of cabbage(maybe 2#) in a salt brine overnight(osmosis) & with all the other ingedients it just barly fits in my 1 gallon fermenter.Happy Fermenting!!
Comment by Mike Magana — February 2, 2011 #