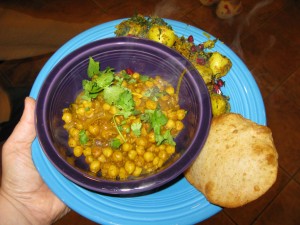
Meatless Monday: Channa Bhatura
I know that I’ve already posted one recipe for bhatura, and a recipe for channa masala, but these are completely different versions which everyone in the family has decided we prefer.
The bhatura recipe is more authentic than the one I wrote about before–there is no yeast in it at all; instead it is leavened with a starter made from equal parts all purpose flour and yogurt. It is based on Yamuna Devi’s recipe from Lord Krishna’s Cuisine with the exception that I used Greek yogurt in the starter and substituted whole meal spelt flour for some of the all-purpose flour.
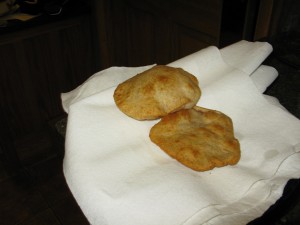
This version of bhatura is thinner-walled and flakier–more delicate than the yeast-raised version I posted previously. But the dough is no harder to work with, roll out or fry, so there is no reason not to try making it.
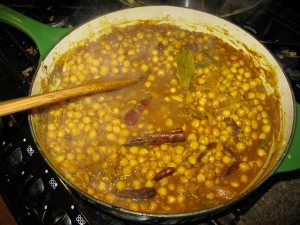
As for the channa–I think that there are about a thousand different ways to make channa masala. Probably more than a thousand–for every household or restaurant where it is eaten, it is cooked slightly differently. I based this version on the one they serve at Udipi Cafe in Columbus, Ohio, which is my favorite vegetarian restaurant ever, hands down.
Their version has no tomatoes in it, or very few, and is yellow with turmeric instead of red with tomatoes and paprika. It is redolent of cinnamon and fenugreek, and liberally flavored with toasted whole cumin seeds and black mustard seeds. Oh, and it is fiery with chilies both dried and fresh–I should have mentioned that. Mmm… chilies.
You will also note that I served a dry version of aloo methi with this meal. Some of the versions of aloo methi are damper than others–aloo methi tamatar is by its nature wetter, being that one of the main ingredients is tomatoes. I sometimes add yogurt and spinach to it, which makes it saucier. But I have found that the textural differences between a dry curry and a wet one, served with bread and yogurt is most pleasing.
Every piece of bread was eaten–and most of the channa and aloo as well. I have enough of them for a light lunch left over, but nothing else. That’s how I know that dinner was appreciated highly–very little of it was left. I suggest doubling the channa and the bhatura recipes if you have more than five or six people eating, especially if you want anything left to munch on for lunch.
Flaky Bhatura
Ingredients:
1/2 cup whole milk or 2% Greek yogurt
1/2 cup unbleached all purpose flour
1 cup unbleached all purpose flour
3/4 cup whole meal spelt flour (or chapati flour or whole wheat flour or white whole wheat flour or kamut, take your pick)
1/2 teaspoon salt
1 teaspoon raw sugar or honey
1/2 teaspoon baking powder
3 tablespoons melted ghee or butter
about 1/4 cup warm water–use more or less as needed
canola or other vegetable oil for deep frying
Method:
First, the night before you want bhatura, make the starter–take your yogurt out of the refrigerator and let it come to room temperature. Then, preheat your oven to about 100 degrees F. by putting it on the lowest heat setting and turning it off just as it reaches that setting. Open the oven door, and place an oven thermometer on the rack, and when the temperature dips to 100 degrees F, close the door and keep it closed.
Stir the 1/2 cup of all purpose flour into the warmed yogurt, until a smooth paste is formed. Cover lightly with a warm, damp towel or plastic wrap and set inside the prepared oven. Leave the starter undisturbed for eight or ten hours or so.
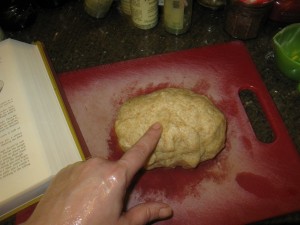
Make the dough–put all the dry ingredients into a large bowl and stir to mix it well. Add the starter and the melted ghee, and the honey if you used it instead of raw sugar. Rub your hands with oil or ghee (ghee is really good for your skin, btw–I used ghee when making the bread yesterday to oil my hands and today they are amazingly soft and silky. On the other hand, it is pretty expensive as hand cream……) and start mixing the dough with your hands. Add as much water as is needed to make a smooth, reasonably stiff, pliable dough.
Knead it for eight to ten minutes or until the dough is springy–a fingerprint pushed into it will start springing back almost immediately when you have kneaded it enough.
Gather dough into a ball, rub the outside with ghee or oil, and put into a small bowl, cover with plastic wrap and let it rest for at least 1/2 hour, or as long as 3 hours.
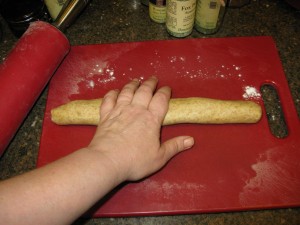
When you are ready to roll out the dough, cut the ball into two equal pieces and roll one into a thick log about 1 1/2 inches in diameter.
Cut this log into seven equal pieces, and roll each of those into smooth balls. Flatten each one with your hand into a disk about 2 inches in diameter.
Dust your surface very lightly with flour, place a disk into the flour, turn over and shake off the excess. Using a rolling pin, roll evenly into a thin 4 inch diameter circle, and set aside until all the other disks are rolled. Do the same with the other half of the dough–roll into a log, cut it into seven equal pieces, roll each into a smooth ball, flatten into disks and then roll out into 4 inch diameter circles. Lay them on a plate and cover with a very lightly dampened towel.
Heat your cooking oil in a wok, karahi or deep saucepan over medium high heat. Test the oil with a dry bamboo chopstick by simply placing it into the oil. If tiny bubbles immediately start traveling up the chopstick tip, the oil is ready.
When the oil is ready, carefully slip a single dough disk into the oil so that it goes in flat, not folded. It will sink to the bottom, and immediately the oil will bubble and foam. After a few seconds, the dough will start to rise at the top. Using a slotted spoon or a mesh skimmer, gently hold the dough under the surface of the oil so that it puffs up into a little bready balloon.
As soon as the bhatura puffs up, hook your spoon or skimmer under it and gently flip it over. Let it brown very gently on the other side–not too much–it will only take a few seconds–then take out the bhatura with your spoon/skimmer and let it drain on layers of paper towels.
Serve immediately, before the bhatura cool and deflate.
Now this means that you should have everything ready–channa, potatoes and garnishes–and -THEN- start frying the bhatura. You can either serve each bhatura as it comes out of the oil to each diner, or you can fry half of the dough–seven portions–serve that, and turn the heat off on your oil. Sit down and eat that, and then, when (note I do not say, “if,” but “when”) your family wants seconds, go back, turn the heat back on under the oil, test with a chopstick and then start cooking the second batch.
These breads cook very quickly–in a matter of seconds, really. I haven’t timed them, but I suspect that they each cook in under a minute. That is indeed, how fast they go.
They get eaten nearly as quickly.
Channa Masala II
Ingredients:
1 pound dried chickpeas
1 teaspoon ground turmeric
1 teaspoon smoked paprika
1/4 teaspoon ground cinnamon
2 bay leaves
2-3 tablespoons ghee
1 large onion, thinly sliced
1 teaspoon salt
5-6 dried thin hot chilies
1 large cinnamon stick
5 whole cloves
8 whole green cardamom pods
1 teaspoon black mustard seeds
2 fresh long, thin green chilies, thinly sliced on the diagonal
4 cloves garlic, peeled and minced very finely
1″ cube fresh ginger, peeled and minced very finely
1 1/2 teaspoons cumin seeds
1/4 teaspoon black peppercorns
1 teaspoon fenugreek seeds
2 cloves
1/2 teaspoon coriander seeds
1 teaspoon ground turmeric
1/2 teaspoon smoked paprika
water as needed
2 tablespoons pappulu podi
1 1/2 teaspoons tamarind concentrate
salt to taste
roughly chopped cilantro leaves for garnish
Method:
Sort through the chickpeas and remove any suspicious looking (shriveled, black or moldy) beans and any small stones or dirt clods. Rinse well with cold water, then put into a large bowl. Cover well with warm water–the water should stand about an inch over the top of the beans–and cover the bowl and let stand overnight.
Drain the remaining water from the beans and discard. Put beans into pressure cooker (or regular large pot) and add water to cover by two inches, one of the bay leaves, the teaspoon of turmeric powder and the powdered cinnamon. Bring to a boil, put the lid on, lock it and bring to full pressure. Turn down the heat, cook on full pressure for fifteen minutes. Then, take the cooker off the heat and allow it to depressurize on its own, gradually. Open the cooker and check the texture of the beans–they should be tender and absolutely done with no crunchy bits. If it is not done, bring to a boil, put on the lid, bring up to pressure, lower heat and cook for another five minutes, then remove from heat and allow the pressure to lower naturally off heat and check again–they should be done at this time.
If you do not have a pressure cooker, put the directed ingredients into a regular deep, large pot, and simmer until the beans are done–about an hour.
Drain the beans, reserving about a cup of the liquid.
Melt ghee in a heavy-bottomed deep frying or braising pan. Add onions, sprinkle with salt and the second bay leaf, and cook, stirring, until the onions turn light golden. Add the whole spices and dried chilies save for the mustard seed at this time, and continue cooking and stirring until the onions turn deep golden brown. Add the mustard seed and the fresh chilies, and cook stirring until the mustard seeds pop. Add the garlic and ginger and lower heat, still stirring, though not as constantly.
Grind the remaining whole spices together and add to the pan with the turmeric and the paprika, and cook, stirring until the onions are a deep reddish brown and everything is fragrant. Add the chickpeas and enough of the reserved cooking water to the pan to deglaze the pan. Scrape all the browned bits up from the bottom of the pan and turn the heat down so it can simmer. Allow to simmer uncovered for 1/2 hour to 45 minutes. Add water as needed to keep the curry moist.
Thicken the curry with the pappulu podi and add the tamarind concentrate. Simmer for five more minutes and add salt as needed to taste.
Remove from heat and sprinkle the cilantro over the channa. Serve immediately with bhatura.
3 Comments
RSS feed for comments on this post.
Sorry, the comment form is closed at this time.
Powered by WordPress. Graphics by Zak Kramer.
Design update by Daniel Trout.
Entries and comments feeds.





Hooray! You’re back! I’m so excited. This looks delicious. Now I’m off to catch up 🙂
(Also, I hope you and the family are well! Happy holidays!)
Comment by Christine — December 14, 2010 #
God Bless you and your family. Nice to see you back. I have missed you this past year . Nice to see your posts back on.
Yamuna Devi book you mentioned. Barbara are you bringing in some good things here. Total Sattvic food(Food for the gods
). Welcome back my dear
Comment by Sam — February 28, 2011 #
Barbara-
This recipe looks wonderful except that there are some confusing passages in the method with respect to the spices. In paragraph 5 the method notes to add the whole spices (3rd sentence) and then in paragraph 6 (first sentence) it instructs us to grind the remaining whole spices. I winged it last night, but suspect maybe the balance and layering was a bit off. Could you clarify? Thanks so much for your wonderful food.
Comment by Paul — March 12, 2011 #