Cook Local, Eat Global
Green Garlic Masala Chicken Curry

My favorite dish at Reethika in Columbus is their Green Chicken Curry. Mrs. Reddy makes hers with coconut milk, and it is a haunting, complex, aromatic version of a South Indian favorite.
While I didn’t want to copy her curry completely, I did want to use it as a starting point to make my own version of Green Masala Curry, so I thought about the melange of flavors that make up her version. Fresh curry leaves are definitely involved, as is cilantro. Methi greens and bay leaves also smell like they are a part of her palette of herbs, so I decided to use those as well.
But, in addition to these gloriously green herbs, I wanted to use a large amount of a seasonal favorite in my kitchen–locally grown green garlic grown by Rich and Ann Tomsu. Why? Because green garlic is like baby garlic–all of its brashness has been toned down to a sweet gentleness that is so delightful, yet rich, that it cannot help but complement any food which is cooked with it.

The other ingredients I used in the green masala paste were fresh ginger, a few cloves of regular garlic, green Thai chilies and thinly sliced well-browned yellow onions. For the cilantro, I used the thick stems from the root end all the way up to the leaves–two bunches worth of them. The leaves, I kept separate, to be finely minced and added near the end of the cooking process.
For spices, I made a garam masala out of toasted cinnamon stick, green cardamom pods, a few cloves, cumin seeds, fennel seeds, coriander seeds, black peppercorns and fenugreek seeds. After the whole spices were toasted, I ground them up, and stirred in a half teaspoon of ground turmeric for its fragrance, color and health-boosting properties.
Instead of the traditional coconut milk base for the curry sauce, I thinned the very thick green masala with a bit of homemade chicken stock and used this as the cooking medium for the chicken. I found it imparted a very rich flavor to the sauce–and besides–I was fresh out of coconut and coconut milk and really didn’t want to go out to the store. (Instead of stock, one could use chicken broth, or vegetable stock or even water, though water would be my last resort.)

At the end of cooking the chicken, to soften the sauce and enrich it, I stirred in about a heaping half cup of Greek yogurt–a very North Indian touch, which makes this Green Garlic Masala Curry is uniquely my own variation.
Finally, at the end, I stirred in some very finely minced cilantro leaves–and allowed them to cook for about three minutes in the sauce, and added salt to taste.
The results were very good, and I was pleased with them, but it wasn’t until I had a bit of the leftover curry two days later, reheated, that my socks got knocked off. After two days in the fridge, the flavors deepened and melted into each other, the individual fragrances and tastes becoming less distinct and pronounced, instead, weaving themselves into a complex symphony of gustatory goodness. The garlic was still quite present, but the fragrance was not unpleasantly bold, but instead, it joined the browned onions in giving an underlying sweetness to the curry, while the curry leaves, methi, cilantro and cardamom all danced together on the tongue, singing as a choir instead of several competing soloists vying for attention.
So, I am quite happy with the end result of all of my experimentation and work and will certainly make this as often as I can while green garlic is in season. After that, I will have to adapt the recipe to the lack of baby garlic in the marketplace.

Green Garlic Masala Chicken Curry
Ingredients:
2 tablespoons ghee or canola oil
2 medium yellow onions, peeled and very thinly sliced
1 teaspoon salt
the stems from 2 bunches of cilantro, chopped roughly (reserve the leaves)
15 very fresh curry leaves
2 heaping tablespoons dried methi leaves, soaked in warm water
1 dry bay leaf, soaked in warm water until lightly softened
7 stalks green garlic, white and green parts, roughly chopped into 1/2″ pieces
2″ cube fresh ginger, peeled and roughly chopped
3-6 fresh green Thai chilies
2 cloves regular garlic
water as needed
3/4 inch piece of cinnamon stick
12-15 green cardamom pods
1/4 teaspoon black peppercorns
1 1/2 teaspoon cumin seeds
1 teaspoon fennel seeds
1 1/2 teaspoons coriander seeds
1/4 teaspoon fenugreek seeds
1/2 teaspoon ground turmeric
1 cup chicken stock or broth
2 pounds boneless skinless chicken breasts and/or thighs, trimmed and cut into 1″ cubes
generous half cup of unflavored Greek yogurt (whole milk is best, but 2% works almost as well)
1/2 cup finely minced reserved cilantro leaves
salt to taste
Method:
Heat ghee or canola oil in a wide, heavy-bottomed deep skillet over medium heat. (Le Creuset cookware works wonderfully in curry making.) Add onions, sprinkle with salt, and cook, stirring until they are a deep golden color. While the onions are cooking, put the next nine ingredients (from cilantro stems to water as needed) into a wet-grinder or blender jar and blend into a thick, deep green paste. When the onions become the deep golden brown color I mentioned, add them to the masala paste and puree again.
In a dry skillet toast all the dry spices but the ground turmeric until they brown a bit and are fragrant. Grind into a powder with a spice grinder. Put the masala paste and the ground spices back into the pan the onions were cooked in (adding a tiny bit more ghee or oil if needed) and cook over medium heat again, stirring constantly until the color of the paste deepens and dulls somewhat from its brilliant green to a more yellow green, and the fragrance is amazing–about three to five minutes.
Deglaze the pan with the chicken stock and bring to a boil. Turn down the heat to medium low so the sauce simmers and add the chicken, stirring until all the meat is covered. Cook until the chicken is just barely cooked through and amazingly tender–about ten minutes.
Stir in the yogurt and allow to simmer again, then stir in the cilantro leaves. Cook for three more minutes, then add salt to taste. Serve over steamed basmati rice.
Note: You could cook this curry up to three days ahead of time for a party or dinner and it will taste even better reheated than it did when you made it the first time. Just don’t add the yogurt and cilantro leaves until you have reheated the dish. THEN, add them and cook as directed above.
Meatless Monday: Hadar’s Stir Fried Tofu, Bok Choy Carrots and Radishes

This one is for my beloved Hadar, who asked last week for more meatless recipes.
You know, I can be just as blinkered and blind as everyone else. Here I am priding myself on my culinary creativity and it turns out that until yesterday, I never really thought about cooking radishes.
Why not?
I dunno.
I guess because I just don’t think much about radishes. They were never my favorite vegetable growing up, even if I was taught as a little kid how to carve them into roses. Lots of people in my family loathed them–they were “too spicy” and while I liked them a little bit even when they were “hot” when I was little–I much preferred raw turnips, to radishes any day. Turnips were sweeter and crunchier, though not crisper. Radishes have such a wonderful icy, crisp texture.

And, I think that texture, which was always my favorite part of radishes, was why I never thought to cook them before. If you cook them, you mess up that texture, so, why go and do THAT?
But, you see, I am the only one in my house who likes radishes a lot, especially in salads. Kat won’t touch them and Zak is skeptical, though in recent months, he has been acquiescing that some radishes in a salad with a honey-mustard vinaigrette was alright, and maybe even pretty good.
So, I was planning a stir-fry with tofu for Hadar’s recipe, and I looked in the fridge at my bounty from the farmer’s market on Saturday. There was a beautiful bok choi from Shade River Farm, as well as some orange, yellow and purple carrots from the same lovely plot of ground. I could do bok choi and three colors of carrots, but I decided to save the purple ones for Kat to eat raw because she loves them so much.
So, I kept digging in the crisper and came up with these lovely plum-colored big radishes. I think they are the variety, “Plum Purple”, which I just planted a whole packet of seeds from Seeds of Change myself. They are pretty, and crispy and crunchy, but they are a bit spicy. And I said, “Why not?” So, I sliced them into rounds, and then into half moons after giving them as scrub and a trim. I wanted that pretty rim of purple to show.
And you know what?
Radishes are AWESOME cooked! Yes, AWESOME! (It has to be all-caps. No, really, it has to be because of my utter amazement at how tasty the wee purple buggers were once they were cooked! They lose that icy crispness that they have raw, but what they gain is sweetness. They retain their earthy sharpness, but the “heat” is ameliorated by an accentuation of the natural sugars inherent to the vegetable.
You just have to be careful and put them in near the end of stir-frying so they don’t get too mushy.
So, Hadar, this one’s for you, and thanks for giving me the impetus to think about cooking radishes. You, and the rest of my readers, will be seeing more cooked radish dishes in the future. I promise. (Because I’m gonna have to figure out what to do with all the radishes I interplanted in with the tomatoes, onions, potatoes and peppers……)

Hadar’s Stir-Fried Tofu, Bok Choy, Carrots and Radishes
Ingredients:
1 package spiced dry tofu
1 teaspoon dark soy sauce
1 teaspoon Shao Hsing wine or dry sherry
1/8 teaspoon Chinese five-spice powder
1 tablespoon cornstarch
2-3 tablespoons canola or peanut oil
1 1/2 teaspoon raw sugar
3 stalks green garlic, white parts minced, reserve green parts
1 1/2″ cube fresh young ginger, peeled and minced
1-2 teaspoons light or thin soy sauce
1 tablespoon Shao Hsing or dry sherry
2 large carrots, peeled and cut into diagonal oval-shaped slices 1/4″ thick
2 large radishes, washed, trimmed, and cut in half longitudinally, then cut into 1/4″ thick slices
1 medium head of very green bok choy, washed, trimmed and cut into 1″ chunks
3 green tops of green garlic, cut into thin diagonal slices 1/4″ thick
1/4-1/3 cup vegetable broth or stock
pinch salt
1 teaspoon toasted sesame oil
Method:
Slice the tofu slightly on the diagonal into thin, narrow slices. Toss with the soy sauce, wine and 5-spice powder, then sprinkle on the cornstarch and toss until well coated. Allow to marinate for at least 20 minutes while you prep your vegetables.
When you are ready to cook, heat your wok on high heat until a thin ribbon of pale smoke rises from it and wafts straight up into the air. Add oil and allow it to heat undisturbed for at least thirty seconds, at which point it should ripple and shimmer in the bottom of the wok. Tilt the wok back and forth to distribute the oil along the sides of the wok.
Add the tofu, and spread into a thin single-layer on the bottom of the wok. Add the white minced garlic and ginger to the wok, sprinkling it over the tofu evenly. Sprinkle the sugar over it as well, and let the tofu brown undisturbed on the bottom of the wok for at least one minute. Then, begin stir-frying.
After the tofu has become fragrant and the ginger and garlic has begun to stick to the sides of the wok with the tofu marinade and brown, add the soy sauce and wine, and deglaze the wok. Add the carrots and stir fry for a minute or two, then the radishes. Immediately add the bok choy and the garlic greens, then the broth or stock and cook, stirring and scraping the sides of the wok until the liquid thickens and the bok choy leaves lightly wilt and the color of the stems darkens.
Sprinkle with the toasted sesame oil and sprinkle the pinch of salt over. Give it all one more toss, sprinkle with the salt, toss again, and scrape into a heated serving plate.
Serve with steamed brown rice for a light, but still richly flavored and hearty meal.
Note: I made this with all local vegetables and aromatics except for the ginger. You can substitute one clove of garlic and three scallions for the green garlic if you cannot find it at a farmer’s market near you.
How to Read a Seed Packet

“Oh, boy,” you must be thinking to yourself right now. “Barbara’s lost her damned mind. Why does she want to write about reading seed packets? Any idiot can read the back of a seed packet….”
Well, yes, and no.
Really what this post is about is understanding the information that most seed companies put on their seed packets, information that many beginning gardeners might find confusing. Gardening has become a very popular pastime, and in the past couple of years, the number of people growing food plants has skyrocketed in the US. According to a recent Vancouver Sun article the number of households in the US which report growing a vegetable garden has risen from 38 percent in 2009 to 53 percent in 2010. In addition, sales of seeds, garden equipment and gardening books have doubled since 2008. (The statistics quoted above were sourced from the 2010 Summer Gardening Trends Research Report, prepared by the Garden Writers Association Foundation.)
That rampant growth of interest in gardening means that there are a lot of new gardeners out there, and that means that its the least we folks who grew up with a shovel in our hands can do to reach out and give a few words of advice to our newly minted gardening brethren.
So, here I am, reaching out to teach folks how to understand the information that is printed on most seed packets, because while most of them are illustrated on the front with beautifully colored pictures, the important stuff is what is usually printed on the back.

Here’s a photo of the back of the “Mammoth” sunflower seed packet put out by Burpee Seeds. This packet was bought at a local feed and seed store here in Athens, and is typical of how most seed companies package their seeds for retail stores.
First comes a description of the plant’s typical characteristics: “Attractive, large yellow flowers grow on 12′ stalks. Hundreds of plump, thin-shelled seeds are ready to harvest from center disk in 80 days. Annual.”
The pertinent information in this description is thus–the plant is 12 feet tall, the seeds are ready to harvest in 80 days and the plant is an annual, meaning you have to replant it or let it seed itself every year.
Next comes the planting instructions: “SOW in average soil after danger of frost. Sow seeds 8″ apart and cover with 1″ of fine soil. Firm lightly and keep evenly moist. Seedlings emerge in 7-14 days. Harvest when flower heads dry on stalk. Continue to air-dry heads in large paper bags for 2-3 weeks.”
These instructions are fairly straightforward, and included in them is the very pertinent piece of information that the seeds germinate and sprout in 7-14 days. That is a very important thing to know because if you note the date when you planted some seeds, it’s helpful to know when to expect to see some sprouts appearing. Otherwise, you may wait too long before replanting for some seeds that don’t germinate, or you might jump the gun and replant before you need to. In one case, you waste time and in other, money.
In addition to the written growing guidelines, you note the graphics that instruct the gardener to plant the seeds in full sun, to a depth of 1 inch, to THIN the plants (which were planted 8 inches apart) to 12-18 inches apart after they have sprouted, and that the plants will then grow 12 feet tall.
The graphics in this case reiterate the written instructions and plant description with one important exception–the graphics show the gardener thinning the seedlings which were planted 8 inches apart to stand 12-18 inches apart. (The easiest way to do this would be to take out every other seedling so they now stand 16 inches apart.) Thinning is important to get plants to grow to their proper size, and to resist disease, so it is interesting that this step was eliminated from the written instructions, but placed in the graphic illustrations.
This shows how important it is to both read the instructions on a seed packet carefully, but to also look at the graphics and understand them as well. In many cases, the two say the same thing, but sometimes, a crucial step is articulated in one and not the other.
Also note that the Burpee seed pack has instructions in both English and Spanish, so the same information is repeated twice on the small packet.

Some seed packets are even more minimalist than the Burpee retail store packets. Here is a packet of seeds that I ordered from Burpee’s website. It doesn’t even have a picture of the plant on its front–this is common when it comes to seeds packaged for mail-order. This saves money on packaging–full color photographic printing is expensive, while one color printing is not. Most seed companies package their seeds this way for direct sale from the internet, phone or mail–note another example in the first photo above–on the left you can see a packet of seeds for Chinese cabbage from Evergreen Seeds, a leading purveyor of Asian vegetable and herb seeds.
The lacinato kale packet, however, still has minimal information on growing the seed, and it is all still in paragraph form, which requires careful reading. In the general description, the harvest time is noted–60-80 days. In the next section marked “SOW,” instructions are given for how to plant the seeds, including when to expect germination. (7-14 days) Then, instructions on how far apart to thin the seedlings is given in the next section, under the bolded word, “THIN.” Then, there is a section called “GARDEN HINTS” which gives the very useful information that kale requires good cultivation or mulching to keep the soil loose and weed-free. It is also noted that kale can be left outdoors all winter and that frost improves the flavor of it.
In contrast, the Evergreen Seed packet not only gives step by step instructions on how to plant, thin and harvest the cabbage in numbered sequential form, it also gives a very helpful graphic table at the top of the packet that notes what spacing to put the plants and rows, how deeply to plant the seeds, germination TEMPERATURE–meaning at what soil temperature the seeds germinate, and days to maturity/harvest.
I personally like seed packets that give those very useful bits of information in a table format because it is easier to find that way while you are in the garden down on your knees with grubby hands, about to plant. It just makes it all easier to find, read and understand while you are in the process of planting a bunch of different seeds all at the same time.
All seed companies put the same basic information on their packets, but as noted–I prefer the companies that put the planting information in easily found and read charts, graphs or tables somewhere on their packet so when I go to actually get down and dirty with the seeds, I don’t have to read through paragraphs to get to what I need to know.

One of my favorite seed companies, not just because they sell quality seed for unusual and heirloom vegetables and flowers, but because their packaging is exemplary is Renee’s Garden. You can see an example of the beautiful art used on the front of their packets in the very first picture above–here you can see a packet of Tricolor Pattypan Squash. All of the packets are illustrated with lovely full-color paintings of the plants with a quote from Renee Shepherd, the founder of the company, that says, “Set a table in the garden,” but of course, that’s not the important part of their packaging.
The important stuff is all on the back.
Turn the packet over and look on the left side. In a pale green box going vertically up the packet is a table of all the really necessary information for the seeds contained therein: planting dates for both cold and warm climates, sun requirements, how to sow the seeds, days until germination, and days to harvest. There it is–easy to find and read at a glance.
But wait, there’s more. Lots more–on a flap attached to the aforementioned pale green type box, is a description of what exact varieties of seed are in this packet, since three different varieties of pattypan squash are to be found there–yellow “Sunburst” pale green “Peter Pan,” and dark green “Starship.” A key to the individual seeds which have been dyed to tell them apart is also given.

I feel like Ron Popeil here, but we’re not through! Lift the flap and detailed instructions on how to plant and thin the seeds and seedlings, and when and how to harvest the squash. Notes are given on how to protect the seeds and seedlings from marauding birds, and as if that was not enough, cooking suggestions are given as well.
So, now that we know what is on most seed packets, how should we go about reading them? First, look for the most necessary information: when to plant, how to plant, how/when to thin the seedlings, time to germination and time to harvest. If these bits of information are not easily found together, I know of some gardeners who take a highlighter to their packets and highlight them before heading out to plant.
But even once you have those facts in front of you, always read the rest of the packet carefully, because all of the information on those packets is useful, if not essential. And, if you don’t understand something in the terminology or you have questions about the last frost date in your town, do not hesitate to seek information online, or even better, to ask a more experienced gardener, such as can easily be found at your local feed and seed store. Or, call your local County Extension Agent and ask them. They are amazing fonts of gardening knowledge that is specialized to your local area.
So, go ye forth, and read your seed packets and then, get planting! Seeds won’t grow themselves, you know! (Except when they do, like in the case of prolific self-seeding plants like dill, nigella and fennel.)
Untraditional Coconut Beef Curry
Note: This post is two years old, and for some unknown reason, was not published at the time. It was written back when I was still suffering from biliary dyskinesia, which is a fancy way of saying that my gallbladder didn’t work and hurt all the time, even though there were no gallstones in evidence. During this period, I did a lot of experimenting with using coconut milk in Indian curries instead of my usual dairy-trio of ghee, yogurt and milk or cream, because I had found that the saturated fat in coconut milk never awakened my angry gallbladder and made me pay for my flagrant disregard for its sensibilities with a painful assault on my health. At any rate, here it is, in its original form, unedited except for this explanatory note for long time readers who might well remember that I no longer have a gallbladder to complain about. Oh, and one more thing–the dish still makes a great curry–out of curiosity, I cooked it again a few weeks ago to see if maybe I had decided that it hadn’t tasted that good after all and that’s why I never posted it. But, no. It tastes just dandy, so we’ll just have to let the question of why it has languished in blog limbo for two years remain a mystery.
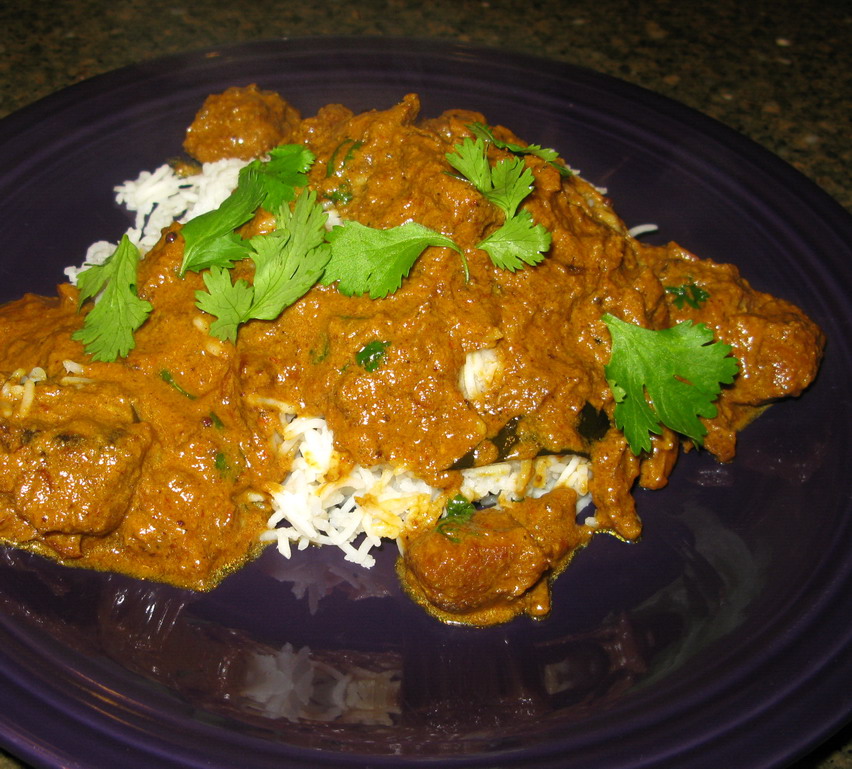
After my success with the recipe for Fragrant Coconut and Chicken Curry from Mangalore, which I adapted from Camillia Panjabi’s 50 Great Curries of India, I wanted to see if I could do a similar curry with lamb.
Unfortunately, I had no lamb, but what I did have was a hunk of bone-in beef chuck, which I had intended to use for boeuf bourguignon. However, I wasn’t in the mood for French food, (with wine and bacon, both of which irritate my unhappy gallbladder) so I decided to make it into curry.
While beef is not eaten by devout Hindus in India, Muslims and Christians do eat it, especially in the northern areas of the country. It is less commonly eaten in the South, as I understand, but I suspect it is not unknown.
Zak was all about it, since, in his opinion, Indian food beats French food hands-down in the realm of tastiness, so I set forth to adapt the chicken recipe to one that would accentuate and complement the stronger flavor of beef.
The first thing I decided to do was to brown the bone along with the cubed meat and cook it in the pressure cooker along with the rest of the curry in order to boost the meaty flavor of the finished dish. Many northern style curries are cooked this way, especially with goat or lamb meat. If the meat is served boneless, bones are cooked in the curry and then fished out before serving, but if the meat is cut up on the bone, such as with goat and sometimes lamb meat, then the bones are just left in for service, and diners can eat around them.
Another change I decided on for the recipe was to the amount of cumin, used both as whole seeds and ground up into the masala paste. Beef, as I have noted many times before, tastes “beefier” when cooked with cumin. Something in the musky, lightly bitter seeds synergizes with the flavor of the meat and enhances it, magnifying the umami flavor immensely. The toasty fragrance of cooked cumin, whether it is pan roasted or fried in oil, also seems to cut through the strong odors associated with beef, and accentuates the delicious aroma of browned meat as the two cook together. It is a nearly magical combination in my mind, and I love using the two ingredients together any chance I get.
Another change in the spicing is my addition of a small amount of fennel seed to the masala.
Fennel is one of the sweeter spices, and while I love to use it in chicken, vegetable and fish dishes, I also find that if it is added in small amounts to meat dishes, especially lamb or beef, it brings a subtle, almost flowery fragrance to those dishes, which offsets the stronger, darker meat flavors. I use a small enough amount that it is never obvious that fennel is there, but it still makes a strong impact, giving a complexity to the masala, that might otherwise be lacking.
I also browned all of the onions before grinding them up into the masala paste, which gives this curry a deep mahogany coloring which I find appealing. This is a trick common to North Indian, Pakistani and Bangladeshi cuisines–and I saw no reason not to use it here. I could have left some of the onions in their original thin slices in order to give the curry a bit more texture, but I wanted to use the onions to thicken the curry somewhat, and figured that a perfectly smooth curry sauce was fine.
I also used more chilies here, in three different forms–fresh, hot red chilies, dried hot chilies and Aleppo pepper flakes, all ground into the masala paste. These add heat, flavor and color–and I added sweet paprika to further boost the red coloration. This not only added a complex flavor–each chili not only adds heat, but each has a different fragrance and flavor, such as the sweetness and mild heat of Aleppo chili flakes–but it helped create the very appealing, rich mahogany color of the finished curry.
Finally, I used more curry leaves, knowing that their intense flavor would very much enhance the fragrance and flavor of a strong meat like beef.
Oh, and one more thing–as is usual with most curry dishes–this dish tastes even better the next day after being reheated!
This recipe could easily be adapted to lamb, but I would be even more interested in trying with either venison or goat meat, myself.
How did it taste? Well, Dan, Zak, Brittney and Kat were all highly in favor of it, so much so that I was asked to make it again soon. As for me, I am looking forward to teaching my readers a trick to use with the leftovers in my next post. Because, as delicious as leftover curry is simply warmed over, it is fun to take it and turn it into a different dish entirely.
Note: Two years later, I am rather stumped at exactly what that trick I was going to write about was. HOWEVER, I am pretty sure it is a trick I learned from the Pakistani/Bangladeshi couple I used to cook for as a personal chef. So, yes, having not shared that secret with my readers it the past, I WILL share it in the future. If it is indeed the secret I am thinking of…..
Untraditional Coconut Beef Curry
Ingredients:
4 tablespoons canola or coconut oil
2 1/2 cups thinly sliced red onions
1 teaspoon salt
2 pounds bone-in beef chuck, cut into 1″ cubes, bone reserved
5 cloves garlic, roughly chopped
2 1/2 teaspoons cumin seed
1/4 teaspoon fennel seed
1/2 inch piece cinnamon stick
3 teaspoons coriander seed
1/4 teaspoon fenugreek seed
1/2 teaspoon mustard seed
1/2 teaspoon black peppercorns
1 large fresh red chili pepper
4-8 dried red chilies, depending on how hot you want your curry
2 teaspoons Aleppo pepper flakes
1/2 teaspoon turmeric
2-3 teaspoons sweet paprika
15-20 curry leaves, fresh or frozen
1 teaspoon cumin seeds
1 teaspoon mustard seeds
1 1/2 cans Mae Ploy coconut milk
2 tablespoons tamarind concentrate
salt to taste
1 cup cilantro leaves, roughly chopped, for garnish
Method:
Heat oil in a heavy-bottomed, wide skillet or pan. Add onions, and sprinkle with the teaspoon of salt. Cook, stirring, until they turn a nice deep golden brown. Remove from heat, scrape the onions into the bowl of a food processor, spice grinder, mixie or blender, and add the garlic, chilies, and the spices up to and including sweet paprika. Grind to a very fine, fragrant paste.
Put the pan back on the heat, add the beef, along with the bone, and cook, stirring, until it is mostly browned on all sides–with a bit of pink showing. Add the curry leaves, and the 1 teaspoon each of cumin and mustard seeds to the pan, and cook, stirring, until the mustard seeds start to sputter and pop. Add the spice paste, and cook, stirring, until the meat is fully browned and the spices are beginning to stick and brown to the bottom of the pan–about one or two more minutes.
Deglaze with some of the coconut milk, being certain to scrape all of the browned meat and spice paste bits from the bottom of the pan. Pour the contents of the pan into a pressure cooker, and stir in the rest of the coconut milk and the tamarind concentrate. Bring to a boil, lock the lid in place on the cooker, and bring to full pressure. Turn the heat down to low and cook for forty-five minutes.
Turn off the heat under the pressure cooker and move the cooker carefully off the warm burner. Allow it to rest, undisturbed so the pressure can come down naturally for about twenty minutes. Once the pressure indicator shows the pressure to be normalized, unlock the lid and remove it. Fish out the bone and either feed it to your dog or discard it, and stir in salt to taste.
Stir in the cilantro leaves right before serving.
Asparagus with Ghee, Cumin and Mustard

This should have been posted on Monday for Meatless Monday, but I forgot and posted about making tender kofta instead. Oh, well–call me a bad blogger this week and look for Meatless Monday coverage again next week.
This dish is so simple and good that I decided not to wait until next week to post it, but to give it to you today. See, now I’m not a bad blogger, but a good one. It all works to everyone’s advantage in the end.
Anyway, this is a great, simple Indian style recipe that shows off asparagus, that paragon of seasonal spring vegetables, at its very best. The native flavor and texture of the asparagus is enhanced by the addition of five ingredients: ghee, mustard seed, cumin seed, lemon juice and salt, and the cooking technique is basic.
It can be varied and livened up, of course. Curry leaves, chili flakes or whole chilies can be added to give the asparagus further zest and flair, but really, I think it’s best to keep it simple, and let the natural flavors of the vegetable shine without competition.
Oh, and one more thing–you can substitute butter for the ghee if you have to, but I urge you to try the ghee first. Its nutty, rich buttery flavor and aroma are part of what makes this dish special. Plain butter just lacks that character.
And yes, if ghee and butter scare you, I guess you can substitute a vegetable oil for them–if you must. However, if you use margarine instead, please don’t tell me about it. I just don’t want to know. It might be good, but it won’t taste like the way I intended it. (And besides–margarine really isn’t any healthier for you than butter–remember artificially hydrogenated vegetable oils contain trans-fats and are not good for you–so if ghee and butter are to be avoided, then use a natural, liquid vegetable oil instead, like peanut, sesame or canola.)

Asparagus with Ghee, Cumin and Mustard
Ingredients:
1 pound thin asparagus spears, bottoms trimmed off and cut into 1 1/2″ pieces
water as needed
1 tablespoon ghee or butter (you can use as little as half a tablespoon, but a tablespoon tastes better)
1/4 teaspoon whole brown mustard seeds
1/4 teaspoon whole cumin seeds
juice of 1/2 lemon (about a tablespoon and a half)
salt to taste
Method:
Put asparagus into a saute pan where the pieces can sit in a single layer on the bottom with little to no overlap. Add water to barely cover the bottom of the pan and come up no more than 1/2 way up the asparagus pieces. DO NOT cover the asparagus with water.
Over high heat, bring the asparagus to a rapid boil and allow the water to begin to boil away. Just as the water is reduced by half, clap a lid on top of the pan and allow the asparagus to steam as the rest of the water boils off.
As soon as the water is gone, remove the lid and add the ghee. Cook, tossing the asparagus, for a minute, then sprinkle with the mustard and cumin seeds and toss to combine. Clap the lid back on the pan and cook, shaking the pan continually, until the mustard seeds sizzle and pop and the cumin seeds brown and become fragrant. This should take no more than a couple of minutes.
Remove the pan from the heat, uncover it and check the asparagus.
At this point the asparagus should be bright green tinged with some brown spots where the sugars have begun to caramelized on the surface of the vegetable. The asparagus should also be slightly wrinkly in appearance and fully tender. If it is not done, sprinkle a little tiny bit of water (like two tablespoons or so) into the pan, put it back on the fire, clap the lid back on and let it steam briefly.
When the asparagus is done to your liking, put the pan back on the fire, and keeping it uncovered, squeeze the juice of one half of a nice sized lemon into the pan. Let the juice mostly boil off before pouring out of the pan into a warmed serving dish.
Sprinkle with salt to taste and toss before serving.

Categories:
- Admin (rss) (55)
- Blogs and Blogging (rss) (81)
- Book Reviews: Cookbooks (rss) (43)
- Book Reviews: Non-Cookbook Food Books (rss) (38)
- Cats and Cat Blogging (rss) (47)
- Chinese Cooking Lessons (rss) (32)
- Culinary School Stories (rss) (18)
- Dairy Pruducts: Cultured and Barbaric (rss) (4)
- Documentary Filmmaking (rss) (1)
- Essays, Rants and Reflections (rss) (260)
- Fighting Hunger (rss) (12)
- Food and Kids (rss) (45)
- Food in the News (rss) (126)
- Food Media (rss) (98)
- Food Preservation (rss) (18)
- Food Safety (rss) (45)
- Gardening (rss) (30)
- Herbs and Herb Blogging (rss) (20)
- Holidays (rss) (50)
- Kat Blogging (rss) (22)
- Kitchen Science (rss) (36)
- Leftover Makeover (rss) (8)
- Life, the Universe and Everything (rss) (131)
- Local and Sustainable (rss) (227)
- Local Athens Food and Foodies (rss) (42)
- Meatless Mondays (rss) (32)
- Menu For Hope (rss) (5)
- Nutrition, Diet and Health (rss) (84)
- On The Farm (rss) (8)
- Recipes: Almost Vegetarian, Vegetarian and Vegan (rss) (294)
- Recipes: American Regional (rss) (37)
- Recipes: Appalachian Hillbilly (rss) (33)
- Recipes: Bread, Pasta, Grains (rss) (95)
- Recipes: Canning and Preserving (rss) (8)
- Recipes: Chinese (rss) (123)
- Recipes: Comfort Food (rss) (120)
- Recipes: Cookies (rss) (16)
- Recipes: Desserts (rss) (48)
- Recipes: French (rss) (25)
- Recipes: Fruits and Vegetables (rss) (302)
- Recipes: Greek, North African and Middle Eastern (rss) (31)
- Recipes: Indian (rss) (137)
- Recipes: Italian (rss) (42)
- Recipes: Japanese (rss) (7)
- Recipes: Jewish (rss) (4)
- Recipes: Korean (rss) (6)
- Recipes: Meat, Poultry and Fish (rss) (220)
- Recipes: Mexican/Native American/ Latin American/Caribb (rss) (27)
- Recipes: Original (rss) (108)
- Recipes: Thai (rss) (27)
- Recipes: Tofu (rss) (17)
- Recipes: US Regional (rss) (16)
- Recipes: Vietnamese (rss) (8)
- Restaurant Stories (rss) (28)
- Sewing, Quilting, Arts and Crafts (rss) (16)
- Simple Chinese Recipes (rss) (30)
- Slow Food and Heritage Foods (rss) (10)
- Spice Blogging (rss) (44)
- The Chinese Cookbook Project (rss) (14)
- The Chinese Pantry (rss) (39)
- The Documentary (rss) (2)
- The Kitchen Saga (rss) (17)
- The Locavore's Bookshelf (rss) (15)
- The Unsung Adventures of The Culinary Nerd (rss) (6)
- Tools and Toys (rss) (35)
- Uncategorized (rss) (10)
- With a Side of Politics (rss) (48)
Archives:
- August 2012 (9)
- July 2012 (12)
- September 2011 (3)
- August 2011 (7)
- July 2011 (8)
- June 2011 (16)
- May 2011 (17)
- April 2011 (11)
- December 2010 (9)
- November 2010 (5)
- February 2010 (1)
- December 2009 (5)
- November 2009 (7)
- October 2009 (10)
- September 2009 (16)
- August 2009 (14)
- July 2009 (14)
- June 2009 (7)
- May 2009 (17)
- April 2009 (10)
- March 2009 (25)
- February 2009 (13)
- January 2009 (10)
- December 2008 (5)
- November 2008 (5)
- October 2008 (6)
- September 2008 (13)
- August 2008 (8)
- July 2008 (11)
- June 2008 (18)
- May 2008 (13)
- April 2008 (14)
- March 2008 (16)
- February 2008 (17)
- January 2008 (19)
- December 2007 (25)
- November 2007 (18)
- October 2007 (24)
- September 2007 (16)
- August 2007 (15)
- July 2007 (15)
- June 2007 (10)
- May 2007 (14)
- April 2007 (16)
- March 2007 (17)
- February 2007 (20)
- January 2007 (13)
- November 2006 (1)
- October 2006 (8)
- September 2006 (14)
- August 2006 (25)
- July 2006 (30)
- June 2006 (28)
- May 2006 (34)
- April 2006 (29)
- March 2006 (24)
- February 2006 (30)
- January 2006 (38)
- December 2005 (40)
- November 2005 (37)
- October 2005 (32)
- September 2005 (25)
- August 2005 (30)
- July 2005 (28)
- June 2005 (21)
- May 2005 (8)
- April 2005 (22)
- March 2005 (17)
- February 2005 (29)
- January 2005 (10)
Search Site:
Links:
- Lily’s Wai Sek Hong
- 101 Cookbooks
- A cat in the kitchen
- A Veggie Venture
- Accidental Hedonist
- Cha Xiu Bao
- chez pim
- Chocolate & Zucchini
- Chopstick Cinema
- Chowhound.com
- Chubby Hubby
- Cook sister!
- Cooking with Amy
- da*xiang
- Eat Local Challenge
- Eating Liberally
- Ecocentric
- Eggbeater
- Epicurious
- Farmgirl Fare
- Fatfree Vegan
- Foodgoat
- ForkandBottle.com
- Green Olive Tree
- Hooked on Heat
- Jaden’s Steamy Kitchen
- Kalyn’s Kitchen
- Lucullian delights
- Mahanandi
- Matt Bites
- MeatHenge
- mmm-yoso!!!
- New York Times – Dining & Wine
- Pizza Goon
- Rasa Malaysia
- Ruhlman
- Sailu's Kitchen
- Serious Eats
- SF Gate: Food & Dining
- Simply Recipes
- Soul Fusion Kitchen
- Tastespotting
- The Amateur Gourmet
- The Cleaner Plate Club
- The Food Section
- The Grub Report
- thecookscottage
- U.S. Food Policy
- Wandering Chopsticks
- Washington Post Food and Dining
- Wasted Food
Meta:

Powered by WordPress. Graphics by Zak Kramer.
Design update by Daniel Trout.
Entries and comments feeds.