Blessed are the Cheesemakers: Integration Acres Tomatoes Au Gratin
August and September are the Months of the tomato here where I live. It’s when the tomato-glut occurs when every seller at the Athens Farmer’s Market and every roadside stand and the Chesterhill Produce auction is pushing tomatoes of every type, size, color and flavor. They are everywhere.
It’s when I can tomatoes and make marinara sauce and salsa and can those and I eat tomatoes every day raw in salads, on sandwiches, just sliced up on a plate and just biting into them like apples. I eat them like this now because I never eat fresh tomatoes when they are not in season. So I have to gorge myself on them now while I can so I can get good and sick and tired of them so I won’t be momentarily tempted by the baseball-hard pink monstrosities in the grocery stores in the winter months.
But in addition to eating them raw, I cook with them as well.
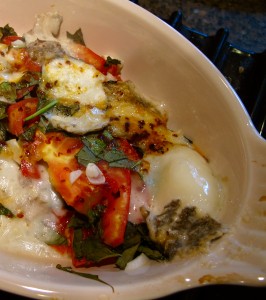
For example–I got the idea for this tomato gratin from the folks at Integration Acres–they posted it on their Facebook page last Saturday morning and my eagle eye of course caught it on my newsfeed. It involved fresh tomatoes, basil, garlic and blue goat cheese all melted and delicious and I just had to taste it.
Their picture for it looked so darned good, I went right to the Farmer’s Market when it opened and bought the cheese, and got some tomatoes so I could run right home and make it.
(Can I say again how much I love both the fresh and ripened goat cheeses from the Integration Acres people? They really are great. I bet there’s a great cheesemaker near you–run right out and find them as soon as you can. Your taste buds will thank you later. And remember–“Blessed are the Cheesemakers…..”)
I hesitate to even dignify this by calling it a recipe, because it really is so simple. But that’s okay–it’s summer cooking at it’s finest–it’s simple, quick and absolutely allows the tomatoes, garlic, basil and cheese to shine like gustatory beacons.
It also fills the belly admirably for such a light dish.
Integration Acres Tomatoes Au Gratin
Ingredients:
Olive oil as needed
Fresh, meltingly ripe tomatoes–enough to fill a small casserole dish–two or three depending on the size you have
1 clove of very fresh garlic, peeled and minced
1 handful of fresh basil leaves, minced
2-4 ounces of your favorite blue cheese if you can get a ripened blue–all the better
salt and Aleppo pepper flakes or other hot pepper flakes to taste
Method:
Preheat your broiler and make certain that your rack is about three to four inches below the burner.
Lightly oil a small casserole dish with the olive oil.
Wash, core and cut the tomatoes in half. Then, thinly slice them into half-moon shapes. Toss them into the casserole.
Sprinkle the garlic and basil over the tomatoes and drizzle lightly with olive oil. Toss to distribute everything together nicely.
Top with crumbled or chunked bits of the blue cheese, then season with some salt and Aleppo pepper flakes, then drizzle a tiny amount of olive oil on top.
Pop it under the broiler and cook until the cheese is melted and everything is bubbly, happy and delicious with some browned bits on top.
Serve it over toasted bits of good bread. Or, just dig in with a spoon and gobble it right out of the dish. It’s great either way.
Farmer’s Market Lunch: Stuffed Tomatoes
If you patronize your local farmer’s market, you may be surprised at the huge number of different types, sizes, colors and shapes of tomatoes available out there.
Tiny round red, green, yellow or orange cherry tomatoes, pear (usually yellow but sometimes red) tomatoes, long finger-like red cherry tomatoes, giant beefsteaks in myriad colors and bi-colors, red or orange plum tomatoes for making sauces, and even tomatoes that are relatively hollow inside that are perfect for stuffing.
Stuffers are available in red, yellow or a pretty striped variety that is red with orange-yellow tiger stripes. It is the latter type I found for sale by Larry and Kim Cowdery of Cowdery Farms, and of course, I had to pick some up.
The truth is, you can stuff any kind of tomato you want, even cherry tomatoes (I’ve done it–I don’t recommend it, though–it’s maddeningly finicky to stuff things that small), but these mostly hollow stuffers are simple. They have three to five chambers for their seeds and the gel that surrounds them, with evenly thick walls of flesh surrounding them. They are also kind of squat or bell-shaped so they have a nice flattish bottom to sit on.
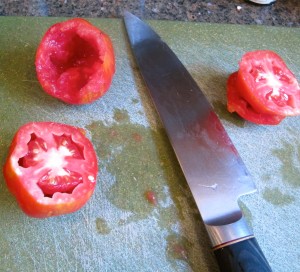
All you have to do is cut the top off the tomato and use a scoop, spoon or just your fingers (guess which venue I chose–yep, fingers) to remove the seeds and gel. Now you have a nice hollowed out tomato ready for filling up with whatever you like.
And I mean it. ANYTHING can go into a tomato.
I personally like to use leftovers. I basically combine an already cooked leftover grain: rice, spelt berries, bulgar wheat or quinoa, with a leftover sauce, then add any vegetables I want, and voila! Stuffing.
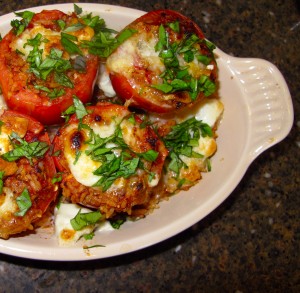
In the version pictured–I heated up leftover steamed rice, and mixed it with heated up leftover sausage-enriched (Harmony Hollow Farm Italian Sausage) marinara (the last of the jars I canned last fall) that I used for lasagne. I added some sauteed onions (from Vest Berries), but I could have easily added some steamed broccoli or sauteed chard or spinach.
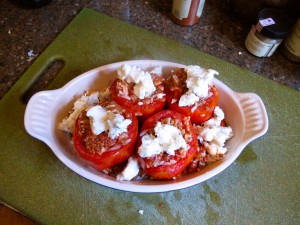
I made a bit more filling than I needed to to fill the tomatoes and after oiling the bottom of a small casserole dish with olive oil, I lined the bottom with the filling, then filled the tomatoes and nestled them into the rice and sauce mixture in the dish.
And then, I added cheese.
I used a ripened blue goat cheese from Integration Acres called “Percy’s Blue.” When melted under a broiler, the cheese melts into an unctuous, delicious, gooey, satisfying topping that contrasts beautifully with the still cool, fresh tasting tomatoes, and the warm, flavorful filling.
Finally, I minced up some Greek Columnar Basil from my deck garden and sprinkled it on top.
The result is an almost completely local Farmer’s Market lunch–the exceptions were the rice and the olive oil. If I had wanted to be perfectly local, I could have used Shagbark Seed & Mill’s spelt berries and Hartzler’s butter instead.
Stuffed tomatoes are very versatile. One could use cooked dried beans instead of grain, or in addition to grain. Or, you could use leftover grilled or roasted corn, cut from the cob, as the grain. Any kind of cheese could be used as the topping. Or, one could use Greek yogurt as a topping.
For sauce, one could use salsa or instead of a tomato based sauce, use a creamy one like Alfredo. Or, one could puree roasted bell peppers and use that as a sauce.
Basically, instead of a recipe, this post is going to give you a formula so you can make up your own versions of stuffed tomatoes. It’s a great, frugal way to use up leftovers and turn them into something new for a very quick lunch or dinner dish. It can have meat or be vegetarian, it can be vegan–it can be made however you like it.
Stuffed Tomato Formula
Ingredients:
8-12 stuffing tomatoes (or beefsteaks)
1 1/2 cups cooked leftover grain (corn cut from the cob, rice, spelt berries, bulgar wheat, quinoa, wild rice or cooked dried beans, or a mixture of the two) (If you have huge beefsteak tomatoes, you will need more grain or beans.)
1 1 1/2 cup leftover sauce (salsa, tomato or cream based pasta sauce, pureed roasted vegetable sauce) (If you use really large tomatoes, you will need more sauce)
1/2 cup cooked leftover vegetables (optional)
1 teaspoon olive oil
2-4 ounces of any kind of meltable cheese or Greek yogurt
Minced fresh herbs for garnish
Method:
Preheat your broiler to high and set the rack so it is within two to three inches of the burner.
Cut the very tops off of the tomatoes and scoop out the seeds and gel to leave a hollowed out cup.
Heat the grain and sauce in the microwave and mix them together. Use enough sauce to bind the grain together. Add the leftover vegetables if you want, and mix it into the filling.
Lightly oil the bottom of your casserole pan–use the smallest dish you can to fit the number of tomatoes you have.
Stuff your tomatoes, and pack the filling so it is just even with the top of the tomatoes. Do not mound it–if you mound it, the melted cheese will have a tendency to slip off the top.
Put leftover filling into the bottom of the casserole and settle the tomatoes onto it, leaving them close together in a cluster.
Add cheese or Greek yogurt to the top of the tomatoes and over the top of any exposed stuffing in the casserole dish.
Run under the broiler for 5-10 minutes, or until the cheese is bubbly and lightly browned and everything is heated through.
Remove from the broiler carefully, turn off the broiler and garnish with minced herbs.
Let’s Get Cultured: Making Yogurt
Long time readers probably know that I love to cook with yogurt, and that it appears in a great many of my recipes. I use it in mashed potatoes, curries, baked goods, pancakes, sauces, cheese dishes and lots of cold salads and raitas. It is, in fact a staple in my kitchen, so right before I started writing this blog again, I had decided to take up making my own yogurt.
I’d been told it was simple to do, and the results were better than what you can buy at the store, and generally cheaper.
Now, I have to cop to being very picky about my yogurt. I use whole milk Greek yogurt, which is strained, thus making it thicker and creamier in texture, and my preferred brand is Fage. But, I knew that the milk the folks at Fage was still from CAFO dairy cows, who are fed God-only-knows-what and are treated pretty abominably. I really wanted to use our delicious local Snowville Creamery milk that is from cows who eat grass, hay and the tiniest amount of grain, who are never fed bovine growth hormone, and who are beautiful and lovingly cared for on fields very close to my home.
The milk from cows who eat grass is structurally different from the milk from cows who eat grain and God-knows-what-all, and it is healthier for us. Snowville cream and milk are what my family drinks, so it made sense to switch over to making yogurt from their milk if I was serious about making sure to give my family the best food possible.
So, I had to take up yogurt making.
And, it really isn’t all that hard, but it isn’t something that you can kind of do slapdash and get really good results. Remember, I’m picky about my yogurt. I like it thick, tart, and creamy, so I had to work a bit to get the good results I wanted.
But the work was worth it and I can pass on what I learned to my readers and make your putative journey into cultured milk products a bit smoother than my own was. (Because, yes, readers, I DID screw up a couple of batches of yogurt. Yep. I was very sad I had no hogs to feed it to, just some cats, because two quarts worth if ick yogurt is too much for kitties to eat!)
So, first of all, let’s talk about tools.
The first and most important tool you need for making yogurt is NOT a yogurt maker.
It’s a good, accurate food thermometer. Preferably with temperatures marked in five or ten degree chunks. Or a good digital thermometer. I have a Taylor that goes from 0 to 220 degrees–for yogurt you only need it to go to 160 degrees F. but you won’t find a probe thermometer that stops at 160, so don’t worry about it. It’s not a digital thermometer–I don’t love those because you cannot calibrate some of them, so I stick with the good old fashioned ones with the dial on them.
To calibrate a thermometer with a dial, check and see if there is a hex nut on the back where the probe meets up with the dial. If it’s there, you can test and calibrate it. Do this by setting up a glass of ice water and sticking the probe into it. It should read after a few seconds, exactly 32 degrees F. If it’s off by a bit in either direction, you will notice on the probe’s plastic cover (which you should always use when you’re not using your thermometer) a plastic hex wrench–a cut out the same size and shape as the hex nut–so you use that to move the dial up or down to get it to 32 degrees. Pretty neat, huh? You will find that right out of the package, your thermometer may be off by a degree or three in either direction, sometimes as much as five degrees.
Just calibrate it and get ready to play with milk.
Other necessary tools: a heavy bottomed pot that holds at least four quarts of milk–that would be a gallon. No, we are not going to make a gallon of yogurt at a time, but we going to be stirring two quarts of milk in this pot rather vigorously, and then whisking it, and you will make less of a mess if your pot is only half full than if it’s about to boil over.
A whisk. Self explanatory. A wooden or plastic spoon. A metal ladle and a four cup capacity liquid measuring cup.
If you are going to strain your yogurt to make good Greek style yogurt, may I suggest that you obtain a bag made of fine cloth for doing so. I tried using cheesecloth and it was MESSY, and it let too many milk solids out with the whey, so I got frustrated and got some unbleached finely woven 100 percent cotton muslin at the local quilt shop–but you can get it in any fabric store–and sewed myself up some bags a little smaller than a standard pillowcase, and prewashed them, then hung them to dry. I use my bags inside out to keep the fraying bits of cotton on the seams from getting into the yogurt. You can also use a cotton pillowcase–lots of people on the ‘net suggest that. I just didn’t have any extra ones laying around.
But whatever you do–don’t do the cheesecloth thing–it will annoy the bejeezus out of you, and you will end up with far less yogurt in the end than you should, because lots of it will seep out of the cheesecloth no matter how many times you prewash it and how many layers you use.
Oh, and you need something to culture your yogurt in.
Here’s where a yogurt maker can come to play. You can use an electric one, but I don’t love them. They tend to use little tiny jars to make your yogurt in, but I use it in cooking, so I want to make lots of yogurt at a time. But if you want to make it to replace those little fruity cups of yogurt you buy in the store, then maybe the electric version with the wee jars is for you. We’re all different.
Or, you can use just a plain old two-quart glass jar with a towel wrapped around it placed inside an oven with a pilot light lit, or a warming oven, or a preheated 110 degree F. oven which is then turned off or inside a parked car, or in a styrofoam cooler with lots of towels wrapped tightly around it to keep it warm, or inside a thermos bottle with a towel wrapped around it set in a styrofoam cooler. All of these methods work, but I found that I got annoyed at keeping tabs on the temperature.
See, yogurt needs a temperature of about 110 degrees F. for about 8-15 hours to culture. And while all of these methods do work, they can require some fussing and futzing, and I got annoyed at all of that.
So, how did I decide to make my yogurt if I don’t like electric yogurt makers or the jar and towel in some insulated warming device methods? Did I do it in a crockpot? No, that bugged me, too. I wanted to do it without electricity if I possibly could because that just makes sense to me. (Being without power after the derecho storm for days probably had something to do with it, too.)
I decided to use a Yogotherm yogurt maker, which doesn’t use electricity, makes up to two quarts of yogurt at a time, and works much better than the jury-rigged methods I tried before I got it.
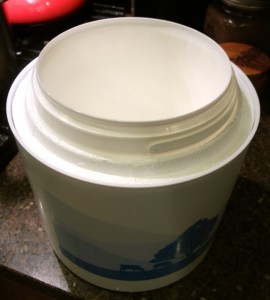
It’s a simple thing, really. A BPA food grade plastic bucket with a lid and a handle to hold the culturing milk, and a Styrofoam inner layer that the bucket fits very tightly to for insulation, and an easily wiped clean styrene outer layer that provides easy cleaning and looks nice and lasts longer than Styrofoam, because it’s tough and not apt to be destroyed by five year olds and cats.
No moving parts, no heating elements, and all easily washable.
I highly recommend it.
And then, you need milk.
I say that you should buy the best milk you can buy. I use whole milk, and I sometimes add extra cream for extra richness, but good whole milk will do fine for the first time.
Good milk, and oh, yes, some yogurt culture.
Now, you might be able to hike down to your natural food store and pick up a box of culture. Or, you can pick out your favorite natural unflavored brand of yogurt and use it–lots of people swear by Stonyfield for having the most live active cultures in any commercial yogurt.
Or, you can order some online from Cultures for Health. They have lots of different specific strains of yogurt culturing bacteria in freeze-dried form, and they give explicit instructions on how to activate them and whether or not they can be used serially to make new batches of yogurt from the previously made batch.
I did a combination of both methods: using commercial yogurt and two cultures from Cultures for Health–I chose a combination of Fage and Stonyfield yogurt and a combination of both Greek and Bulgarian culture strains. I added each one singly and ended up blending them together to come up with a really tangy, rich yogurt with good flavor and texture.
To use commercial yogurt as your starter, just follow my directions. To use Cultures For Health’s starters, first follow the directions they provide for activating the starter (basically you make a small amount of yogurt) and then following my directions, make a full batch of yogurt.
There are a couple of caveats I’m going to mention before I give the recipe/formula for the yogurt.
One–it is absolutely essential to heat the milk up to at least 160 degrees F. but no hotter than 180 degrees F. Yogurt cultures need milk between 90-110 degrees F. to work, but don’t think you’re being smart by only heating your milk up to 110 degrees and putting in your cultures and letting it go. IT WON’T WORK.
You need to heat the milk up to 160-180 degrees F. to denature the proteins in the milk so that when it cools off and the yogurt culture is added, it will turn into a nice, smooth, creamy, delicious dairy product that you will want to eat.
If you only heat up the milk to 110 degrees, and add your culture and let it sit, you will end up with a ropy, mucousal, slimy and icky mess of a dairy product that if you have hogs around, they will thank you for, but I guarantee, you will NOT want to eat. It’s nasty. It’s icky. It’s gross. Don’t go there, because I’ve already gone there for you.
Do not waste your milk.
That’s the first caveat.
The second is simple–make sure all of your tools and utensils and hands are perfectly clean before starting. If you are really OCD about it you can sterilize everything with boiling water–but don’t submerge your entire thermometer–just the probe–otherwise you break it. But you don’t have to be completely nutty about it. Just make sure stuff’s clean and well rinsed–detergent in your culturing vessel will make your yogurt not work right–and it will make it all taste funny.
The third is this–if you want, you can add powdered milk to your milk to boost the protein content and to make a thicker product. I personally have had good results without taking this step. But I will note where you can add it if you want, (After the milk has been heated and then cooled down to culturing temperature) and I’ll give you an amount if you want to use it. (About a half cup per quart of milk.) You can get organic dry powdered milk from Organic Valley.
Okay, now I think we’re ready to get us some culture!
Strained Greek-Style Yogurt
Ingredients:
2 quarts of whole milk (Or, a mixture of whole and two percent milk, or a mixture of whole milk and cream, etc. If you add cream, do it in this ratio: 7 cups milk and 1 of heavy cream)
1/3 cup of commercially available yogurt or “mother” culture made by following the instructions from the company that makes the culture
1 cup nonfat dry milk
Method:
I bet you never thought you’d read a recipe from me that had two or three ingredients, but here we are. I’m just full of surprises.
Set out your yogurt or mother culture to warm up to room temperature about an hour before you make yogurt. If it’s too cold, it will cool off your warm milk too much when you add it. You do not want this to happen.
Get out your big pot that holds at least four quarts, and your thermometer, wooden spoon, ladle, whisk and big measuring cup. Make sure everything is really clean and wash your hands really well. If your hair sheds, this is a good time to wrap it in a do rag, pop it under a hat or shave your head.
Pour your milk into the pot and put the pot on medium heat and start stirring. Get used to it: you’re going to stir a lot for a while. Don’t worry, it’s good for you. Builds character and forearm muscles.
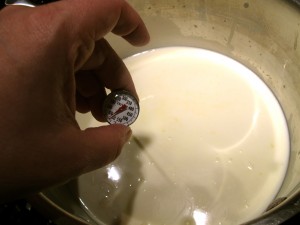
Take out your thermometer and check the temperature with one hand while you stir with the other.
When it gets to 160 degrees, turn your heat down and keep stirring. At this point, you can keep it at 160 degrees for five minutes or you can slowly let it heat up to 180 degrees. I generally stop at about 170. I keep it at my high temperature for five minutes and then remove it from the heat. I set the pot on my counter, but you can also fill your sink with ice water and set the pot in there. That will help you cool the milk faster.
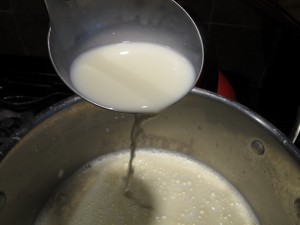
Cooling the milk is easy, but it can take a while. If you use a sink full of ice water, it will go faster, but just using your ladle to stir, scoop and let the milk pour back into the pot from a height of about seven to eight inches will cool the milk by about five degrees per eight minutes or so of work. It cools faster at first, but the last five degrees seem to take forever. Whatever, you need it to get to 110 degrees. Do not let it cool down past 90 degrees. 110 is what you are shooting for.
Scoop about a cup of milk and put it into the big measuring cup. Now is when you add the nonfat dry milk if you are going to use it. Whisk it into the milk in the measuring cup and do not stop until it is completely combined. If there are lumps in this milk, there will be lumps in your yogurt.
Whisk in your yogurt or starter.
Check your temperature. If it is below 110 degrees F, especially if it’s below 90 degrees F, you need to pop it onto the stove, and heat it up until it comes to 110 degrees and NO hotter. So put it on low heat, stir the whole time and keep that thermometer in the milk and when it gets to 108 degrees, take it right off the heat and turn off the stove. It will go up the next two degrees on its own.
Pour the yogurt into your culturing container, close it up and do whatever it is you are going to do to keep it warm. In the case of my Yogotherm, I just pour it into the plastic inner chamber, close the inner lid and then close the outer lid and leave it in a warmish, quiet place.
Now, leave it alone for eight to twelve hours. I get it ready before I go to bed and then check it in the morning.
After it’s been between eight to twelve hours, open up your container and see what has happened. What you should see is a thickened mass that is still somewhat fluid, but mostly solid. The cream will have floated to the top, and underneath it should be thickish yogurt.
Put it in your fridge and let it cool off and firm up for another five hours at least. I often leave it for eight hours. It thickens a good bit on its own while it cools down slowly.
Okay, if you just want regular yogurt, it’s done and ready to eat.
If you want Greek style strained yogurt, now is the time to get out your straining bag or pillowcase.
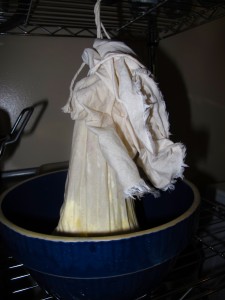
Pour your yogurt into the bag, twist the top and tie it with a string. Hang the bag from a shelf, a cabinet nob, a hanging pot rack or whatever other sturdy thing you can find to hang it from, with a bowl underneath to catch the whey. Put it someplace cool, where no cats, children or other flies can get to it. I hang it from a shelf in my utility room which I keep closed.
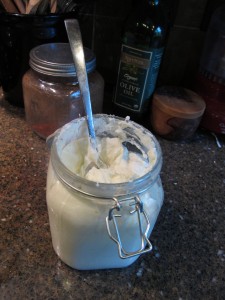
Leave it for two to three hours and when it’s done, scrape it into a storage jar, and whisk it lightly to distribute the cream.
The whey you can keep to put in soups, cook vegetables in, or to use as the liquid in bread baking. You can also use it as a starter for kimchi or sauerkraut. Or, if you have cats, you can give it to them, or you can make ricotta cheese with it, or you can feed it to your dog or hogs if you have them.
When all of this is done, you will have thick, creamy natural Greek yogurt at a fraction of what Fage costs in the store.
We’ve gotten to where we like the flavor and texture of the homemade yogurt much more than the commercial. It’s the quality of the milk and the different cultures I used in it, as well as the amount of cream I use in it that I think makes the difference.
Eat your yogurt however you like or use it in cooking. You just need to leave 1/3 cup of yogurt for culturing your next two quarts of milk which you should make within 7 days. After that, your cultures may die. I make my yogurt on Sundays.
I Hope You Like Jammin’ Too
‘Cause I been doin’ a lotta jammin,’ and I wanna jam it wid you.
Last year, I only made strawberry jam, and I THOUGHT I made enough for last at least part way through the winter, with something like 12 half pints, but I was so wrong. WRONG because Zak liked it so much that he invented reasons to eat it. Totally unnecessary peanut butter and jelly sandwiches on good bakery bread with good peanut butter were made and consumed just so he could eat more of that strawberry jam.
This year, I made twenty-one half pints of it and then froze a bunch of berries to make more when that ran out. I made strawberry jam back in May, and guess what? I already have to break out some frozen berries to make up another big old batch.
But that’s not the jam I made today.
Oh, no, chile.
Strawberry jam is good, but what I made today is like heaven in a jar.
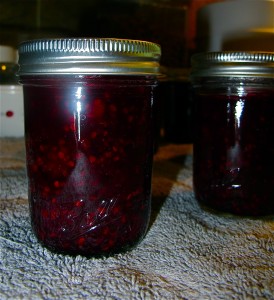
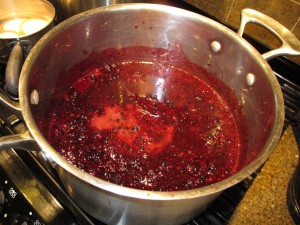
Because Kat, Zak and I went out to our friend, Rick Vest’s farm and picked blackberries from bushes that were burdened with heavy fruit. And to me, there is nothing better than homemade blackberry jam. Nothing. It’s SO good. So tangy-sweet, sticky and the color–red-violet–is just eye-popping.
And, if you leave the seeds in, which I always do, blackberry jam is simplicity itself to make.
Why do I leave the seeds in?
Well, I figure when I eat blackberries, I’m eating the seeds so why should I object to the seeds being in the jam? I mean, really. Plus, I’ve found that if you try and remove the seeds, you lose a lot of the fruit pulp, too, and I refuse to waste something that I spent hours in the hot sun picking in the company of bees, wasps, mosquitoes and a child complaining of heat and thirst.
So, when you eat my blackberry jam, you’re eating it with the seeds. And if I use it in any of my baking, you get the seeds. If you don’t like the seeds consult with a less lazy blogger to find out how to remove the wee buggers without ending up needing to pick a thousand pounds of berries for a few pints of jam. I’m just not your girl for that process.
And while you’re looking stuff up, find out how to clean and treat your jars, lids and rings for safe canning by looking at the USDA National Center for Home Food Preservation’s website. They have all the information you need to know to can safely. They will of course, also try and scare you to death about canning, but the fact is, lots of us have canned for years and never killed anyone yet, so just follow their directions to prepare your half-pint canning jars, new lids and rings for this recipe and you will not go wrong.
For this recipe, I cleaned and sterilized 18 half pint jars, lids and rings, but ended up only using 17 of them. You might end up with 18. It could happen–you never know.
AND now, let’s talk about pectin.
Pectin is a surprisingly sore subject with lots of folks who make jams, jellies, preserves and marmalade out there in the food blogging world, because apparently there is a contingent of “preservistas” who think you just suck the big wang if you use any kind of pectin to get your jams to gel and will get all huffy and be like, holier than thou about it.
I say “horse-hockey.” If you want to use pectin, use pectin. If you don’t, don’t. But I will tell you what–my Grandma made literally gallons of the clearest, most delicious wild blackberry jelly in the world–we’d literally pick the tiny seedy things in five gallon buckets so she could extract enough juice–and she used pectin.
If it was good enough for Grandma, then it’s good enough for me.
Look, pectin isn’t evil. It isn’t artificial, and the use of it doesn’t denote that you’re a bad jammer. It’s nothing more than a substance that exists in fruits in their natural state, that when placed in the presence of sugar and heat, causes your liquidy fruit juice to turn into a nice, thick gel. That’s all. It’s not extracted from a cow’s stomach or made out of plastic. It’s fine and dandy, and I use it, and you can, too.
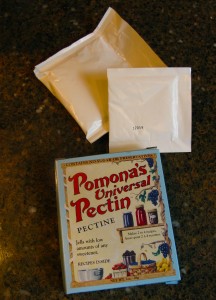
That all said, I tried out a new to me pectin today and am a convert to what I see is the pectin of choice for all the food blogging world. That would be Pomona’s Universal Pectin, and instead of relying upon sugar to make it do it’s job and make a gel, it utilizes calcium.
Now, before you start frothing at the mouth about the calcium, remember, you need it for strong bones and teeth, so hush and listen. Pomona’s is made from citrus peels–again–nothing bad there–and it has two packets in each box. One contains the powdered pectin and the other has the calcium powder. You can tell them apart because the calcium is in the tiny packet.
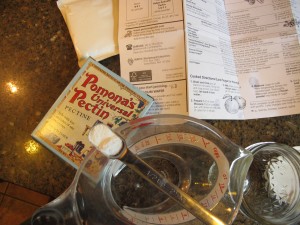
Before you start jammin,’ though, you need to make calcium water, and Pomona’s has directions on how to do it right in the box. You just mix 1/2 teaspoon of the calcium powder with 1/2 cup of water in a small clean jar with a lid. You use the directed amount for your recipe and the rest you can keep sealed up in your fridge for the next time you haul off and preserve some fruit for winter.
After you do that, you can start jammin’ with impunity. All you do to make cooked low-sugar jam (AH HA! Now you know why I like Pomona’s Universal Pectin. I can make low-sugar jams that taste great and gel exactly the way I want them to!) is mix the mashed up fruit with the directed amount of calcium water and lemon juice if you need it to balance the flavors, and bring that mixture to a boil. Meanwhile, you measure out your sugar, stir the pectin in completely, and when the fruit boils, you stir in the sugar, and keep stirring for about two minutes while the lovely scented fruit mixture bubbles happily away. This makes certain you dissolve the pectin thoroughly into the fruit and juice. You bring it back to a boil, then remove it completely from the heat and pack your jars. Then you use your hot water bath canner and process it in boiling water for ten minutes, then take the jars out and sit them on a towel to cool off and seal properly. And voila! Jam.
It really is easy.
And it gels up much better than the regular grocery store brands of pectin that I’ve used for years. It’s more reliable, from what I can tell.
So, finally, we get to the recipe for the jam pictured above. It’s very simple, it uses Pomona’s Universal Pectin, which you can get at local natural food stores, Whole Foods or online.
Once again, if you want to remove the seeds, keep in mind you will have to have picked more berries. For my recipe, I got 2 mashed cups of fruit from each quart of whole berries–if you remove the seeds, it will be a much smaller ratio of fruit. Think about that while you are picking or buying berries.
Summer Blackberry Jam
Ingredients:
10 cups fresh blackberries, washed, picked over and mashed
5 teaspoons calcium water
5 tablespoons lemon juice
2 tablespoons butter
5 cups sugar
6 teaspoons Pomona Universal Pectin
1 1/2 tablespoons Cortas rosewater
Method:
Put the fruit, calcium water, and lemon juice into a heavy-bottomed pot on a medium low fire and bring to a boil.
While the fruit is heating, stir together the sugar and pectin quite thoroughly. After the fruit mixture boils, add the butter and sugar/pectin mixture all at once and stir the still bubbling fruit for at least two minutes to ensure that the pectin and sugar dissolve thoroughly.
Bring back to the boil and after it boils, stir in the rosewater thoroughly, then remove from the heat and ladle the hot jam into jars, leaving 1/2 inch of headpace. Fit a flat lid and then add the screw lid, making the ring tight.
Process in a hot water bath for ten minutes under fiercely boiling water. Remove from canner, set on a folded towel on the countertop, and leave undisturbed for twelve hours.
As mentioned before, have 18 half pint jars ready. I only needed 17, but I had quite a few scrapings and tastings before I packed the jars, so I might have had enough before Kat, Zak and I started taste testing it.
Sichuan String Beans with Bacon
I’ve already posted two different version of Sichuan string beans–both of them dry fried. There’s the more traditional one with pork and a vegetarian variation.
There’s a reason I’ve done two different versions of the recipe–it’s one of my favorite Chinese dishes ever.
I’m in good company–it was also Zak’s Grandma Doris’ favorite Chinese dish.
There’s just something about the chewy texture of the beans with lightly crispy, browned exterior and the sweet, concentrated bean flavor (concentrated because dry frying cooks out most of the water in the beans) that is ultimately satisfying. Add Sichuan peppercorns, chilies, and preserved Sichuan vegetable–and it’s a beautiful combination of flavors, textures and colors.
So why am I posting a third version of it?
Because I can introduce you to another cooking technique, tell you about a great Sichuan restaurant in Columbus AND because I can write about a really good recipe all in one post. That’s why, so there.
First, about that Sichuan Restaurant in Columbus (2869 Olentangy River Road, next to Buckeye Bar & Grill). Zak and I read about it on alt.eats.columbus and after their ringing endorsement, we had to go and try it out.
So we did.
And it was GOOD.
In fact, it’s pretty much the best Sichuan food I’ve had since we moved away from Maryland that I didn’t cook my own self. Now, I have to admit, I like my own Ma Po Tofu better, but their Dry Fried Beef and Lamb with Fresh Chili and Cumin rock my world.
The last time we were there, we tried their “Mala String Beans,” which is their own variation on Sichuan Dry Fried String Beans.
The restaurant, however, didn’t dry fry the beans–they oil blanched them just until the skins of the beans wrinkled and crisped and there were only a couple of browned spots on the beans. Dry frying produces a smokier, more browned result–these beans were slightly juicier because more water was left in them, brighter green and with a slightly crisper texture.
They also had been cooked with thinly sliced fresh garlic, dried chili peppers and thinly sliced fresh chilies, with copious amounts of who Sichuan peppercorns sprinkled throughout. There was a tiny drizzle of soy sauce in the dish, and perhaps the tiniest sprinkling of sugar, but I am not positive about that.
They were addictive. Not too salty, not too sweet, not wet, not dry. Ringing with spices.
As Baby Bear of Goldilocks fame would say, they were “just right.”
So, of course, I had to try and make them at home.
And, as per usual, I had to go and meddle with the recipe somewhat to make it my own. Besides, I had about a quarter pound of King Family Farm bacon unused in my fridge that would be a shame to let go to waste.
But before we start into the recipe, let’s talk a bit about oil blanching.
Oil blanching is a technique used in Chinese cooking, primarily Cantonese and Sichuan cooking, to impart a special texture and flavor to the food that is cooked in this manner. It is an expensive technique, so it tends to be used more in festival foods, restaurant cooking, and banquet cookery, but it can be done in the home. I personally wouldn’t do it often myself–it uses too much oil for my own sense of health and a happy food budget, but it’s perfectly fine to do it every now and then.
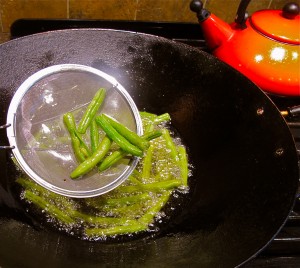
Basically, using a wok, which means you will ultimately use less oil, you heat up enough oil to just cover the food you are blanching–you can do it in two or three batches if need be–and you heat it until a chopstick or a bit of the food you are cooking put into it foams up and boils merrily away in the oil. I heat the oil on medium heat to keep it from smoking and starting to break down–it takes a wee bit longer that way, but you end up with a better tasting end result.
For this recipe, I used about 3/4 inch of oil in the bottom of my wok. It was just enough to cover my string beans and have them float without crowding themselves in the oil.
After it’s heated up, you add the food you are going to cook–and before you add it you make certain it’s perfectly dry on the outside unless you like sputtering oil spattered all over yourself and your kitchen–and stir it with a chopstick to break it all up and distribute it evenly.
Then you let it cook until it’s just cooked through, remove it from the oil and drain it on paper towels. When you are finished with the oil–you can filter it and use it again, but after oil blanching any vegetable, you are better off discarding it because it’s full of liquid that has cooked out of the oil, and with the water in the oil, it won’t really cook anything well again. It also takes on a funny odor after a while.
But that’s all there is to oil blanching, which you need to know about to replicate this recipe.
Oh, one more thing–if you leave out the bacon, the result will taste more like what we had at Fortune. If you keep the bacon in and you aren’t a vegetarian, I bet you’ll be happier.
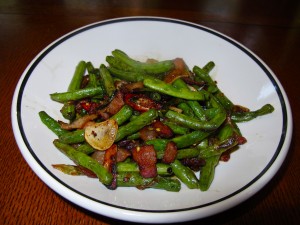
Sichuan String Beans with Bacon
Ingredients:
1 pound string beans, topped, tailed, snapped into bite sized pieces and washed, then dried thoroughly
enough peanut or canola oil to fill your wok up to about 3/4″ to 1″ deep
1/4 pound bacon, cut into thin slices
2 large garlic cloves, peeled and cut into paper-thin slices
3 scallions, white and light green parts, cleaned and thinly sliced on the bias
5 fresh red and green jalapeno peppers, cut into julienne slices
1 teaspoon whole sichuan peppercorns, picked over to remove stems and twigs
2 teaspoons thin soy sauce
1/4 teaspoon toasted sesame oil
salt to taste
Method:
Put the oil into the wok and heat up on medium heat until a green bean dropped into the oil will immediately start bubbling and frothing away.
When it’s hot, add all the green beans at once, and using a bamboo chopstick, maneuver them around until they are distributed evenly in the oil without overlaying each other at all.
Cook, stirring with the chopstick now and again, until the color of the beans deepens and brightens, the skin wrinkles up and just begins to brown and crisp in a few spots on the edges. Fish the beans out with a skimmer, and drain on layers of paper towels.
Discard the oil, leaving a shiny, thin layer on the wok. Wipe the wok clean on the outside and put it on the heat again, and raise the flame to high.
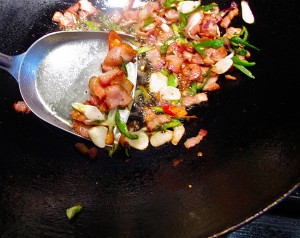
Add the bacon to the wok and cook, stirring until it’s half done. Add the garlic, scallions, chilies and peppercorns at this time and cook, stirring until the bacon is done and the garlic and scallions are golden brown. Add the beans back in and cook, stirring, one more minute.
Turn off the heat, add the soy sauce and sesame oil, and sprinkle in salt to taste–probably about a pinch will do.
Serve immediately with steamed rice. It goes beautifully with Ma Po Tofu.
Powered by WordPress. Graphics by Zak Kramer.
Design update by Daniel Trout.
Entries and comments feeds.

