Creme Fraiche: Tastier Than Sour Cream, and Easy to Make
 Creme fraiche is nothing other than French sour cream, a cultured dairy product made of nothing but heavy cream and some happy bacteria.
It’s a good introduction to making your own cultured dairy products, too, as it is beyond simple, since you barely have to heat the cream above room temperature and add either some commercial cultured buttermilk or a creme fraiche starter culture. You then cover it loosely and let it sit on a warm, not hot countertop out of drafts and away from the sun for about twelve hours and like magic, you come back to some rich, thickened, lightly tangy cream that is stable when it’s heated.
Yeah, let’s say it again, and more firmly this time. Creme fraiche is stable when it’s heated.
Commercially available sour cream is most emphatically NOT stable when it’s heated. In fact, it’s rather unstable after being heated and will often “break” when whisked into a simmering sauce, There is nothing more annoying than adding sour cream to a delectable sauce at the end of cooking and have it go all lumpy and curdly instead of making a nice, smooth, tangy creamy sauce. And yes, this can happen even when you are good and “temper” the sauce by whisking a small amount of the hot sauce into the sour cream before incorporating it into the rest of the sauce. (This is part of why I’ve used full fat Greek yogurt in my Beef Stroganoff for years–because it can be boiled and it will not break once it’s put into a sauce.)
But creme fraiche–well, it doesn’t break. You can boil it. It’s fine. You can temper it into a sauce, but you don’t have to. For all it’s velvety, lightly tangy delicate flavor, it’s tough, like a streetwise flower child who wears love beads and a set of brass knuckles.
And it tastes really, really good, too.
Very rich and satisfying.
Oh, and did I mention how easy it is to make?
Well, I’ll say it again. It’s easy to make. Easier to make than yogurt, because you don’t have to hold it at 110 degrees Fahrenheit for eight to twelve hours.
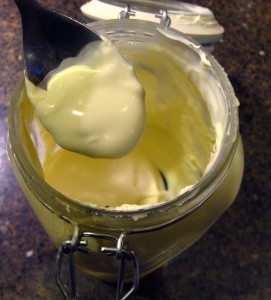
If you use commercially cultured buttermilk, just heat up a pint of heavy cream to 80 degrees F. (I used our local Snowville Creamery Heavy Cream, which is from grass-fed antibiotic free, growth hormone free cows just one county over from where I am typing) to room temperature and stir in two tablespoons of buttermilk. Pour into a clean glass jar (I use the locking ones with the gaskets like the one pictured above) and cover with the lid, but don’t lock it. Leave it in a warm, draft-free area out of the sun for 12 hours. Yes, I said twelve hours. Twelve. Please don’t get all worried about spoiling your cream or food poisoning. In this process, you are making friends with good bacteria, and they are keeping the bad bacteria at bay and are making your fresh cream into something sublime. Trust me.
After twelve hours, the cream should have thickened without solidifying, and should have the texture of commercially available yogurt. It isn’t as thick as the sour cream you’re used to buying from the store, but if you want to thicken it, you can put together several layers of cheesecloth and spoon the creme fraiche into it and tie the ends together and hang it up to let some of the whey drain out for an hour or so.
I used a starter from the company Cultures for Health. They sell yogurt starters, kefir starter, various dairy cultures and starters for vegetable ferments and soy ferments, and so far, all of their products I’ve tried have worked well. (Yes, you’ll have more posts on culturing milk coming up in the future.)
Their instructions are a bit more complicated, but not by much. They instruct you to heat one quart of heavy cream to exactly 86 degrees Fahrenheit, then stir in the contents of one packet of starter (they are sold in a box of four packets which can only be used once for $4.99–which is more expensive than the buttermilk, but in order to not use milk from a confinement dairy, I decided to go with the culture instead) into the cream, cover it and let it sit in a nice warm, non-sunlit place for 12 hours. I used my jar as noted above–I covered the jar with the lid, but didn’t seal it up.
How did it turn out?
Well, let me just say that everyone who tasted it buckled at the knees and rolled their eyes up in their heads. I ended up giving lots of my first batch away, so I never got to use much of it. That’s okay. I love my friends.
What can do you with Creme Fraiche.
Use it in any way you’d use sour cream, except be prepared to have your socks knocked off by the result. You can use it to top a cheesecake. You can use it in your Beef Stroganoff sauce. You can use it on a taco, on a baked potato, in mashed potatoes or swirled on top of a bowl of cream of tomato soup. It can go on top of fresh berries.
You can also just dig a spoon in and have at it plain and straight up.
Just use your imagination.
It’s good stuff.
Trust me.
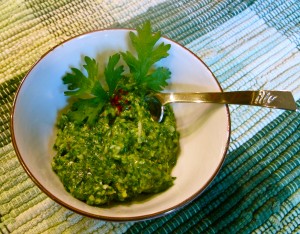
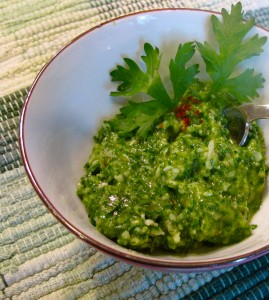
I Dunno, Lad, But It’s Green….(Cilantro Pesto)
Which meant I made it only out of Italian basil, pine nuts, garlic, Parmesan cheese, salt, pepper and olive oil. And I eschewed pestos made of other, untraditional herbs, cheeses and greens as being inferior copies of a perfect Italian sauce. Pesto was only made of Italian basil, pine nuts, garlic, Parmesan cheese, salt, pepper and olive oil, and just because someone ground up some green herbs, something cheesy and some garlic and olive oil together in a food processor did not mean they could or should call it pesto. It was really just some tasty green stuff that needed a name other than pesto, because it wasn’t pesto.
(You must forgive me for my rigidity–I’d been reading a lot of Marcella Hazan, and she really is a pesto purist.)
And then, I started adulterating it with heavy cream, because I found that the addition of cream slowed down the natural oxidation that causes the emerald green sauce to turn brown, and eventually black very soon after it’s added to hot pasta or whatever else you put it on. The addition of cream is not a method approved by Harold McGee, the great explainer of all questions culinary, but I found I liked it better than his suggestion to cook the pasta in acidulated water, which results in tart pasta (blech), or his belief that if you just use leaves and no stems or flowers bracts, the pesto will not darken (it still does, just more slowly), or his assertion that if you use pine nuts instead of walnuts, it doesn’t darken as much. The problem was that I used pine nuts in the first place and as soon as the oil is ground up with the basil leaves, the leaves oxidize and that’s just all there is to it.
So, I started adulterating the pesto. For some reason that I do not quite understand, except that perhaps the cream seals out the oxygen by coating the tiny basil leaf pieces, the addition of cream slows oxidation so much that it is essentially is no longer a problem. It keeps it brilliant green all through the length of an average meal.
But one adulteration leads to another, as most adventurous cooks already know.
I took to adding some raw spinach leaves to the food processor–about 1/10th of the total volume of the basil leaves–along with adding the reduced cream at the end. This resulted in a very green pesto that had a luxurious velvety mouthfeel thanks to the cream and still tasted of supremely fresh garlic and basil.
Then, I started reacting badly to tree nuts, and away the very expensive pine nuts went.
No one noticed. The pesto still tasted mighty amazing.
So, I took to adding some Aleppo chili flakes instead of black pepper and some Thai basil and lemon basil along with the regular Genovese basil that I had used for years.
At this point, I had dipped my toe into the heresies of unconventional pesto-making far enough, that I decided to jump in feet first and just go all the way.
What tipped me over the edge was a taste of some cilantro pesto that John Gutekanst of Avalanche Pizza had to dip some of his amazing bread he sells at the Athens Farmer’s Market on Saturdays. It was green, glorious and good, popping with fresh flavor that any cilantro and garlic lover would crave, but I still hated calling it pesto.
But what to call it? “I dunno, lad, but it’s green,” (Star Trek Geek points to the reader who knows who says this in what episode and in what context) is way too long of a name for a foodstuff, so I gave up and just call it Cilantro Pesto.
But mine is very different from John’s.
I figured if I was going off the chain and putting cilantro in pesto, I might as well just throw in whatever I felt like, and not be constrained by what other people might think was right and proper. Besides, I was already risking the wrath of Marcella Hazan, so I might as well go down with a happy tongue and a full stomach, right?
So, I added a few other herbs. Some basil. Thai basil. Some Italian parsley. A wee pinch of fresh spearmint. The greens of a scallion.
And, I put some other green things in–like a kale leaf for bitterness and some spinach leaves for color and vitamins.
And I left the Parmesan cheese out and replaced it with two year old super-sharp white cheddar made right her in Ohio.
And Aleppo pepper flakes. And, a smidge of black peppercorns.
Of course, garlic, but also a bit of scallion bottom–the white oniony bit.
And finally–olive oil.
No nuts. Sadly. I would have tossed in some black walnuts otherwise, because their assertive somewhat musky flavor and sweetness would have complimented the cilantro perfectly.
So, what did I use my wicked, subversive, heretical pesto on?
Well, I first used it as a condiment on a cheeseburger. And it was wonderful.
It’s also good on grilled chicken, as a bread dip and I bet it would make a great pizza sauce with toppings of fresh heirloom tomatoes, roasted red peppers and fried eggplant. It’s great mixed in scrambled eggs, though it does make them, well, a wee bit verdant-looking. So, if you are unlike Sam-I-Am and you do not like green eggs and ham, don’t put this pesto in your eggs.
But my favorite use has been to melt it on some just browned sauteed zucchini or yellow summer squash. Stirred up with the sweetly caramelized squash, it’s just rich, gooey, nummy and good.
Well, anyway, here’s the recipe. It’s super-easy and can be frozen for up to four months and thawed with no ill effects.
Oh, and unlike basil pesto–it doesn’t oxidize easily–so no need for the cream. (But, of course, you can add it to a cream sauce if you like…..)
Cilantro Pesto
Ingredients:
3 cups tightly packed fresh cilantro leaves and fine stems, washed and well dried
1 3″ sprig of Thai basil leaves, removed from stem, washed and well dried
1 crown of Italian basil leaves (just the leaves at the tip of a branch–works out to about four leaves) washed and well dried
1/8 cup Italian parsley leaves, washed and well dried
4 mint leaves
light and dark green top of 1 scallion
2 kale leaves, big vein removed, washed and well dried
1/4 cup packed fresh raw baby spinach leaves, washed and well dried, big stems removed
1/4 cup two year old (or older if you have it) very sharp cheddar
1/4 teaspoon Aleppo pepper flakes
1/2 of the white of 1 scallion
head of garlic, cloves peeled and cut into chunks
olive oil as needed to make a sauce
salt and pepper to taste
Method:
Put all ingredients up to and including the garlic cloves into the bowl of a food processor.
Put the lid on the food processor and start it running. Drizzle olive oil slowly into the feed tube and continue until the ingredients coalesce into a finely ground, thick barely pourable sauce.
Add salt and pepper to taste, and go to town figuring out your favorite way to use this gregariously green stuff.
Note: If you want to make this vegan, replace the cheese with one good tablespoonful of white or shiro miso. I like Miso Master brand. Be careful with your salt addition if you use the miso though.
Images From “Hand to Mouth: The Athens Ohio Food Movement”
 Today was a big day for myself, Dan, Heather and Zak–it was the first time we presented a significant chunk of our documentary in public. We were the first presenters of the morning today at the “Real Food, Real Local, Real Good Institute,” which is all about building a thriving local food economy similar to the one we have here in Athens. We had a small crowd of about thirty people, many of whom were not from Athens, and didn’t know any of the people in our roughly 16 minute film clip, so I was surprised and thrilled to see tears in some of their eyes by the time the credits rolled.
 I credit the intense emotional connection to the excellent soundtrack provided by Zak, the very talented musician who also happens to be my husband. His fingerpicked acoustic guitar song, “So Pretty” and slide resonator guitar version of “Simple Gifts”, as well as a short electric guitar bit called, “Big Ag Blues” were all stupendous, but everyone’s favorite seemed to be a song called “Circle of Life.”
“Circle of Life” is a round, and was written decades ago by one of our oldest friends, Sonja Coble. It was originally sung a capella, but Zak worked out an arrangement with multiple acoustic and electric guitars playing all of the vocal pieces, building the music to a lovely emotional crescendo.
The music combined with the powerful words of our interviewees– farmers, food producers, non-profit directors and businesspeople– and the beautiful footage shot and edited by Dan, into a heady brew which moved our audience in ways I don’t think any of us involved in the project expected.
I’m thrilled now to finish up our interviews–we have about six of them left to do, and start writing a script so we can start the hard work of editing, composing and recording music and doing all of the other post-production stuff that makes a film magical. Having seen the effect it has on other people has energized all of us, propelling us forward toward our goal of seeing this project through to the finish.
So, let me publicly thank the folks working on the film with me: Daniel Trout, Heather Irwin and Zak Kramer, as well as all of the amazingly generous people of Athens who have cheerfully opened their farms, homes, businesses and lives to our cameras and microphones so we can capture their stories.
Together, all of us are making something that I hope can carry the story of how a thriving, continually expanding local food economy evolved in Athens to other communities so that the model can be made anew in other small towns and cities across our country.
We have a great harvest here in our small corner of Appalachian Ohio–now it’s time to plant some seeds elsewhere and watch them grow.
Meatless Monda–I Mean, Tuesday: Three Sisters Quesadillas
 Yeah, I know, I know, Meatless Monday happens on Mondays, which is why they call it “Meatless Monday.” Yeah, well, I’d already written about shallots on Monday, so guess what–we’re going to talk about what we ate for Meatless Monday on Tuesday, which perhaps we shall now call Traife Tuesday.
(I had to go with the alliteration, alright?)
Anyway, now that I’ve thoroughly confused everyone, let’s talk about the meatless dinner I threw together out of my fridge and pantry with no advanced preparation. I was caught out not knowing what we were going to eat at five in the evening, because I’d had so much fun working in the garden I forgot to think up an idea about dinner. These things happen to everyone, so I’ll let you know just how fast one can prepare vegetarian quesadillas with a homemade salsa in a bit more than an hour.
Even with the help of a five year old, I must add.
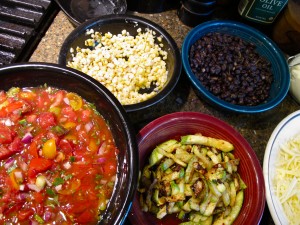
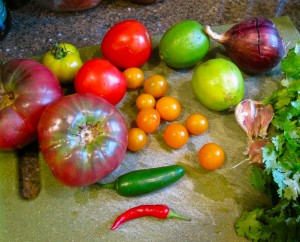
First, I had to dig around in the fridge and see what was there. Two leftover ears of grilled corn, still on the cob (so there’s one bit of advanced preparation), a block of local sharp cheddar cheese, some multi-grain tortillas, a pale green summer squash, a big bowlful of heirloom tomatoes, the first jalapenos and Thai chilies from our garden, local purple onions, cilantro, and some limes I got to make the Thai Basil Chicken we enjoyed last night. Oh, and the Greek yogurt I made yesterday.
All of these were pulled out of the fridge at top speed and handed off to Kat who shuttled them from Mom’s hand to the counter with all the speed and dexterity that every first grader has, which means one of the tomatoes got a bit bruised and a lime was stepped on, but that’s okay, that just broke the juice sacs so we could get more out of it. Right?
So, quesadillas came right to mind, but looking at the corn and the squash, I thought to myself that we needed some beans. Because if you have two of the traditional three sisters, you’d best invite the third one or something bad will happen along the lines of the fairy who wasn’t invited to that princesses’ christening and she laid a nasty curse on her. (Let’s just mix mythologies into a cocktail of confusion, shall we?)
But my containers of pre-cooked beans perished in the slowly thawing freezer during our long power outage, and I had no canned beans, because I’d been pre-cooking and freezing them for so long, so what to do?
Pull out the pressure cooker and make super quick smoky vegetarian black beans. Nothing to it. Once the pressure cooker is up to pressure, the beans took twenty-five minutes to cook and bam! There they were, ready to be drained and added to the quesadillas.
While the beans cooked, Kat and I made Calico Salsa, which she now insists we call Calico Kat Salsa, since she helped cut the tomatoes, pick the cilantro leaves, squeeze the limes and peel the garlic. So, please note the name change, and keep in mind this is the earliest I’ve made it ever, because the tomatoes are all coming in a month earlier than usual. I planted mine out in late March because out winter was so warm. I only had to cover them twice. So, yeah. Weird climate change stuff.
Anyway, on to happier thoughts.
Like sauteing squash.
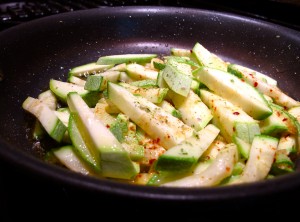
It’s simple–I cut it up into thick julienne pieces (with Kat’s help, I might add), and heated some olive oil in a pan and sprinkled salt on the squash and tossed it around, seasoning it with Aleppo pepper flakes and a sprinkle of garlic halfway through cooking, then tossed it around some more. I let it get nice and toasty brown in spots, caramelizing the sugars nicely, then dumped it in a bowl to cool off.
Then, I shredded the cheese and Kat picked cilantro leaves from the stems and in a flash, we were good to go.
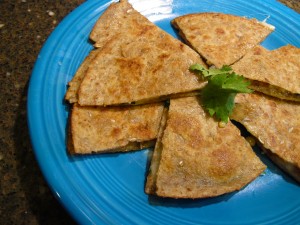
All that was left to do was assemble the quesadillas, fry them lightly in olive oil, cut them up and pass the salsa and yogurt as toppings, and there was dinner. Took Kat and I about an hour and fifteen minutes. (I would have been faster working alone, but it wouldn’t have been nearly as much fun.)
Now, this all said, you can do this even faster if you cook beans ahead of time and keep them in your fridge or freezer, have salsa made ahead or get it from a jar, and keep pre-shredded cheese around your house. Whatever shortcuts you like, do them! Just try and start out from fresh ingredients and you can’t go wrong with this simple, flavorful vegetarian dinner.
These taste great–the earthy richness of the beans, the sweet corn and soft, and the mellow squash are tied together with the tangy cheese and yogurt and the sparkle of the salsa. Well worth the trouble of making, whether are you meditating in the kitchen alone or are helped by little ones and friends.
Three Sisters Quesadilla
Ingredients:
1 pound dried black beans, rinsed and picked over then drained
1 teaspoon smoked Spanish paprika
1 bay leaf
1/2 teaspoon ground cumin
1 tablespoon fresh rosemary leaves
4 tablespoons olive oil, divided
1 zucchini or other summer squash, cut into thick julienne slices
salt
pinch of Aleppo Pepper flakes
2 ears of grilled corn, kernels cut from the cob
cilantro leaves to taste
whole grain mixed grain flour tortillas
8 ounces sharp cheddar cheese, shredded
olive oil as needed for pan frying
Greek yogurt or sour cream for serving1 recipe of Calico (Kat) Salsa
Method:
To cook the beans in a pressure cooker, after picking over them and washing and draining them, add them to the pressure cooker, along with smoked paprika, bay leaf, cumin and fresh rosemary leaves. Add one tablespoon of the oil and then add water to cover the beans by two inches.
Lock on the lid, turn the pressure valve to high, and put over high heat and bring to a boil so that the lid lock button pops up indicating full pressure. Turn the heat down to low and cook for twenty five minutes. Remove from heat, release pressure using the quick release method and when the pressure is released, unlock the lid and open the cooker. Drain out two cups of the beans, saving the rest of the beans and bean broth, if you wish, for another purpose. (I stuck mine in the freezer.) You may season the drained beans as you like–I added extra cumin, some salt and some more smoked paprika, and stirred them up well.
Add three tablespoons of olive oil to saute pan and heat on high. Add the squash pieces and sprinkle with the salt, then cook, stirring and tossing until the pieces go limp and start to turn golden. Sprinkle with the pepper flakes and keep cooking until the squash has released most of its water and has caramelized with some edges becoming crispy and brown. Set the squash aside in a bowl to cool.
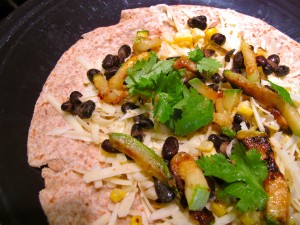
To assemble the quesadillas, lay out one tortilla, and sprinkle with enough cheese to lightly cover the surface, excluding a 3/4 inch border around the edges of the tortilla. Add beans, corn, and squash to taste along with cilantro leaves, then sprinkle a small amount of cheese over the vegetables.
Top with another tortilla, and press the layers together gently but firmly with your hands. Heat in a microwave briefly–for about 12 seconds to melt the cheese slightly, then press the tortillas together so they are kind of “glued” into a single quesadilla unit.
Assemble all quesadillas before cooking.
Heat enough olive oil to cover the bottom of a frying pan that will fit the tortillas. Test the heat of the oil with a bamboo chopstick or wooden utensil. When fine bubbles form around the edges of the chopstick or implement, the oil is hot enough. Carefully slide a quesadilla into the pan and cook until the edges turn brown–about 1 minute, then carefully, with two spatulas, one on the bottom and one on the top, flip the quesadilla and cook until the underside is golden brown and the edges are crispy, about another minute.
Drain on paper towels and cut into wedges. Serve with salsa and yogurt or sour cream.
The Lady of Shallots
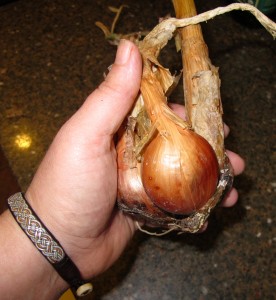 That’s me, though I didn’t get a poem written about me over it. But then I wasn’t cursed to only look at the world through a mirror and constantly weave what I see in some magic tapestry either.
I just grew shallots.
Lovely, delicious shallots.
Which, I am happy to report are even easier to grow than garlic which is easier to grow than onions, especially if you grow them from bulbs rather than seed. (Though in the years to come, I’m going to attempt to grow them from seed, too.)
Some people eschew shallots, swearing that people cannot tell the difference between their flavor and that of onions, but I disagree. Especially in Thai recipes, such as Thai Basil Chicken the flavor of shallots is necessary, for they are milder than onions with a lingering sweetness that really brings a depth to the sauce that is lacking from onions. (Though, I have found that if you are going to substitute onions for shallots, try using smaller younger onions–they have a bit more sugar in them and not as much of the sulfurous scent that gives onions their characteristic bite.)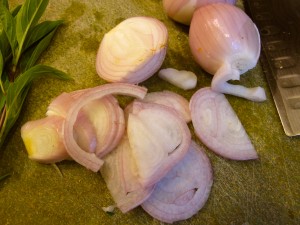
Without shallots, the above recipe, which is Zak’s favorite dish of all time, I think, the dish lacks depth. The sugar in the shallots that caramelizes so quickly in the wok really is magical. And last night, when I made it for the first time with my own shallots, I found that freshly harvested shallots are even sweeter and more delectable than the ones found in the store.
Only one farm family that I know of grows shallots around here commercially (That would be Kim and Larry of Cowdery Farm), and they don’t have them very often, so I decided last fall to give shallots a try. I figured since I hate using the ones from the grocery store from who knows where grown who knows how, and I do have a community garden plot, it should be no trouble for me to experiment with a pound of shallot bulbs.
Territorial Seed Company carries shallot bulbs and seeds both, and they have an admirable selection of both. This year, I grew Sante shallots; next year I am growing them as well as some Dutch Yellow and Gray shallots.
They really are easy to grow.
In the fall, you plant shallots (round end down and pointed end up!) in soil rich in organic matter about six inches apart with the pointed end either at soil level or only slightly below. They are shallow rooted. Water them well, and then mulch well with straw or other organic matter. If the winter is mild, you might see some green sprouts unfurling about February, but they really look like they’re never going to grow until suddenly springy leaf-green shoots start popping up reliably where you planted them. It doesn’t take them long to really start growing like mad, so long as you keep them moderately moist (don’t over-water or under-water) and feed them now and again with some side dressings of compost, manure, worm castings or fish emulsion.
No pests bother shallots. Deer don’t think they’re tasty. Bugs don’t like them. slugs hate them. They can get a bit overly wet and catch a fungus or mold in the bulbs–in that case, if it’s raining too much, pull back the mulch to let the water evaporate a bit. If it isn’t raining enough, like this year, you’ll be happy for the mulch. (I used wheat straw. But chopped up fallen leaves are great, too, or grass clippings or what have you.)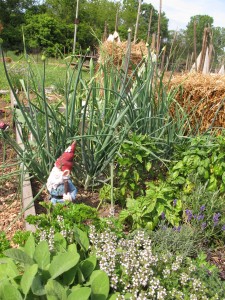
They grow pretty fast to about three feet, and they set pretty white globular blossoms. (You can see in the picture here my shallots with their guardian gnome standing watch.) You harvest them when the tops start dying back, which happened here in July, though I am led to believe that this was early for them. You just pull them up and cut off the stalks about four inches up from the bulbs, and then set them in a dry, cool, airy place to dry out for a week or so.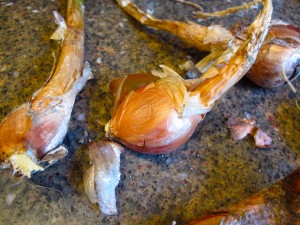
You’ll find that they grow in clumps, with each bulb you planted having at least two, but most often three to five bulbs growing along side it, sometimes attached to it, and sometimes not. If they are attached, pry them apart, and dust off as much dirt as possible before setting them to dry.
And that’s it. That’s how to grow shallots.
Now, what do you do with them? Well, I suggest you try my Thai Basil Chicken recipe above, but shallots are great in other recipes, too. They classically used in vinaigrette and Bearnaise sauce in French cookery and I think they taste just stunning in a stir fry.
They’re good roasted and eaten just by themselves, too.
So, there we are–I’m a Lady of Shallots, and now, you can be one too.
Unless you’re a guy. Then, you get to be Lord of Shallots.
Now if I can just get someone to write a poem about me….
Powered by WordPress. Graphics by Zak Kramer.
Design update by Daniel Trout.
Entries and comments feeds.

