Cook Local, Eat Global
The Intermediate Chinese Pantry

Six months ago, I wrote a post entitled “Staple Ingredients of the Chinese Pantry” where I listed the basic must have goodies for a budding Chinese cook. And the post was a great success, and it helped a lot of folks out and almost immediately, readers were asking for a follow-up on what to buy next.
Well, finally, here is the post that lots of folks have been waiting patiently for, and emailing me about, and I really hope you all find it as helpful as the first one–remember that this list is my own personal opinion on where you can go next in your explorations of Chinese cookery. Adding these ingredients will allow you to make some really great regional classics of Sichuan, Canton and Hunan, and will broaden your tastes a little. These ingredients will give you plenty of new flavors, fragrances and textures to experiment with while you come up with some of your own recipes.
And while you are at the Chinese market, you are going to see lots of other ingredients that I haven’t listed here. Stuff that you may not recognize, but which looks intriguing to you.
Things such as kekap manis–a thick, sweet soy sauce from Indonesia. Or, fermented “stinky” tofu packed in jars with chile paste.
By all means, let me encourage you, that if you have the money, the inclination and the pantry space, to pick up whatever items appeal to you, and experiment. In truth, that is how I have come by most of my knowledge of Asian ingredients: I go to the market, I see something I either don’t recognize, or have only read about in books, pick it up, buy it, take it home and try it out. Some of them, like kimchee, have become fixtures in my kitchen, while others, like the fermented tofu, have been banned forever by Zak and Morganna, who cannot abide the smell. (Whereas I rather liked it.)
I suspect that all of you understand that most of these items are not available in American grocery stores. You are going to have to visit an Asian market or order online for these ingredients. And that is fine–even if there isn’t a market close to you, save your shopping for the next time you take a road trip to the closest big city. Take the list with you, and make an event of your shopping expedition. Have an adventure–it is fun!

Sichuan Peppercorns: These are the tiny dried pods of the fruit of trees of the genus Zanthoxylum, known in English as the mountain ash or prickly ash. These dark russet to brown little pods look vaguely like opened flower buds, and are piquant, with a chilly, numbing quality that is prized among Chinese chefs and home cooks, particularly those of Sichuan province. Known in Chinese as huajiao, Sichuan peppercorns, are also a component of Chinese five spice powder.
They are used whole in soups and long-braised dishes, such as Sichuan beef with turnips, and ground, in Kung Pao Chicken. I have even used them ground up in cookies to amazing effect. If you do not have an Asian market near you, you can order them online at Penzey’s; I keep mine in the freezer, triple wrapped, for maximum freshness, and only grind them right before using them. I also find that toasting them briefly in a small cast iron skillet before grinding them brings out the greatest flavor. For more information on Sichuan Peppercorns, see a previous post on the subject.
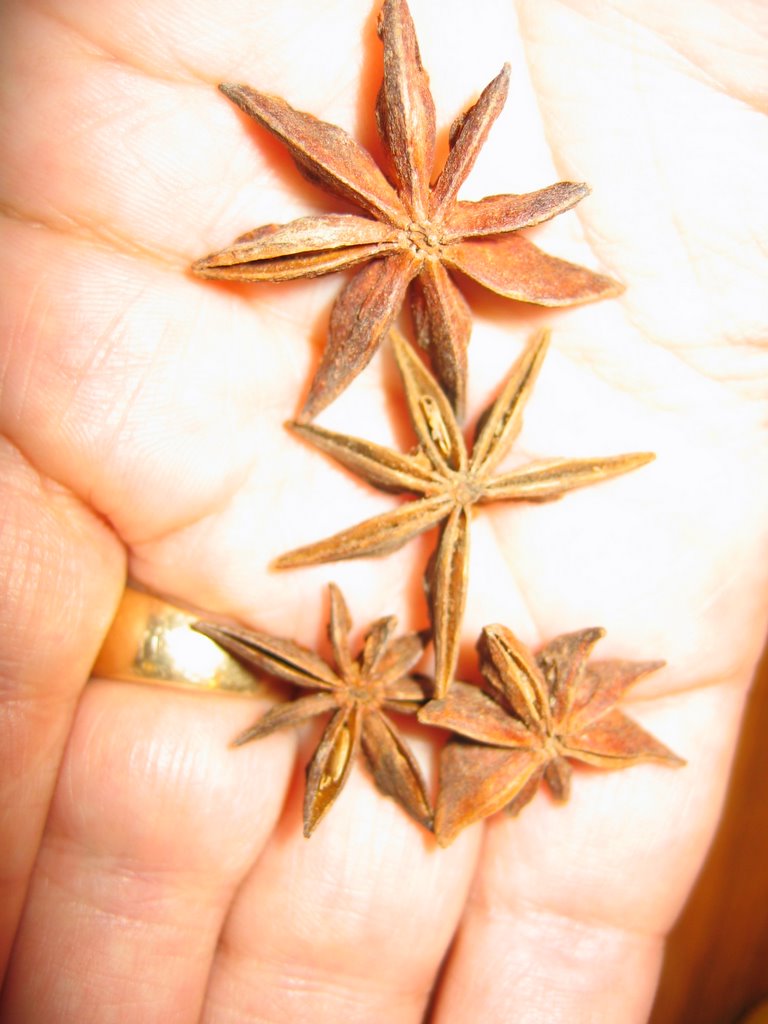
Star Anise: This beautiful star-shaped spice is the pericarp of a small evergreen tree native to China. Star anise, known in Chinese as bajiao, lends its sweet, licorice-like flavor to five-spice powder. It is essential in braised dishes such as Red Cooked Pork with Taro and Sweet Potato. In fact, if you want to make any Chinese braised dishes at all, I would highly suggest getting some star anise, as its flavor is a necessity in those types of dishes, particularly the ones containing red meats such as pork, beef and lamb. It is also useful in Indian cookery, and it is very good brewed with oolong teas; when I have a cold, I like to make a tea with oolong, Sichuan peppercorns, stick cinnamon, cardamom and star anise.
I keep mine in the freezer in order to keep them at maximum flavor and freshness. They are sold in little cellophane packets in the spice and dried foods section of most Asian markets, but if you do not have one near you, once again, you can order these from Penzey’s.

Chili Bean Paste/Sauce: This is an essential ingredient for Sichuanese cookery. Made with fermented soy and broad beans, wheat, salt and chilies, this salty, spicy, dark red condiment is filled with delicious umami flavor, and is the ingredient that gives Sichuan red-cooked meats (such as Beef with Turnips) and Ma Po Tofu its intensity and fragrance. The best brands are actually made fully with broad beans and include the words, “broad bean” on the label. Chili black bean sauce is not the same thing; the flavor profile is completely different and it would never give the correct Sichuanese flavor to the dishes meant to be made with true Sichuanese broad bean chili paste.
My favorite brand that is easily fround in most Asian markets around here is made in Taiwan by Ming Teh Food Industry. The two jars pictured on the left above are both from Ming Teh–they just recently changed their label. The one on the far left is the older label, and the one in the middle is the newer one. They both contain the same sauce: very thick, with a somewhat liquid paste-like consistency, deep red and pungent with a few lumps of intact broad bean left. It is quite spicy, and only moderately salty, with a hefty dose of umami savoriness that gives many Sichuanese recipes their unique character.
Lee Kum Kee makes a version of this sauce which is passable. It is saltier than I would like and not as complex in flavor, but it is acceptable. It is also quite easily found not only in Asian markets but in some American grocery stores as well.
I store this sauce in my refrigerator after it is opened, and it keeps forever. The amount of salt, lactic acid from the fermented beans and chilies pretty much keep all harmful bacteria at bay.
Tianjin Preserved Vegetables and/or Sichuan Preserved Vegetables (Zha cai): I generally have both of these in my kitchen at any given time, however, presently, I only have the Tianjin preserved vegetables from the Tianjin Leiching Pickle Company. They are different, but the flavor profile is similar enough that I have found I can use them in many recipes interchangeably. The Tianjin vegetable is basically a pickled Chinese cabbage made with the lactic acid fermentation process. Garlic is generally added to the pickling mixture, and this gives the cabbage, which has a distinctive crunch, a hauntingly robust flavor. It is used to flavor soups, braised dishes, noodle dishes and stir fries.
The brand that I buy from the company mentioned above comes packed in the beautiful round earthenware crock you can see in the photograph at the beginning of this post.
I just keep it in its crock, sealed tightly with its own plastic cap, in the refrigerator and I have never had anything go awry with it, no matter how long I keep it. Salt-preserved fermented vegetables will keep nearly forever so long as you use a clean utensil to get some out of the crock before sealing it back up again. (Dirty fingers are a no-no.)
Sichuan Preserved vegetable, also known as Zha cai, is the pickled stem of mustard greens. Like the Tianjin preserved vegetable, this is a salted pickle, preserved with a lactic acid fermentation, but instead of being flavored with garlic, the Sichuan version is flavored with a great deal of ground chili pepper.
Before using the Sichuan preserved vegetable, it is best to rinse off the excess salt and chili, then drain it or pat it dry with a towel. Zha cai adds flavor to Sichuan dry fried green beans, and is delicious cooked with noodles or in a stir fry with pork or tofu. It is great in hot and sour soup, too.
The brand that I usually buy, Ma Ling, comes in a can with a red and yellow label. After opening it, I usually put the remainder that I do not use right away into a glass jar and keep it tightly sealed in the fridge.

Pressed Spiced Tofu/Spiced Dry Tofu: Known as either pressed spiced tofu or spiced dry tofu, this is one of my favorite styles of bean curd to use in Chinese or Thai cookery. It is very firm, having had almost all of the water in the product pressed out, after it has been marinated in a spiced liquid. The resulting low-fat protein source is pale tan on the inside and reddish brown on the outside, and has a chewy, meaty texture that is uniquely smooth and quite pleasant. Cut into thin shreds it can be used marinated in noodle salads, cut into very thin strips, it can be stir fried or dry fried until it curls into crisp-chewy petals. Cut into medium thin to thick strips, it can be stir fried or braised.
The brand I use, pictured above, is made by Water Lilies Foods, and the purple, orange or green packages are available in the refrigerated section of most Chinese markets. The different colors on the packets denote different thicknesses of the tofu blocks. Left in its vacuum-sealed package, it lasts quite a long time-just look for the “use by” date stamped on it. Once it is opened, if you have any leftovers, they can be sealed in a ziploc bag for only a few days before it starts to go off.
I use this tofu all the time, and have some in my fridge for a quick stir fry on the spur of the moment, when I have no idea what else to do with it. One of the best dishes using spiced dry tofu as a main ingredient is Spicy Pork With Pressed Beancurd Stir Fry, which I learned from House of Hunan, an excellent restaurant in Columbia, Maryland.
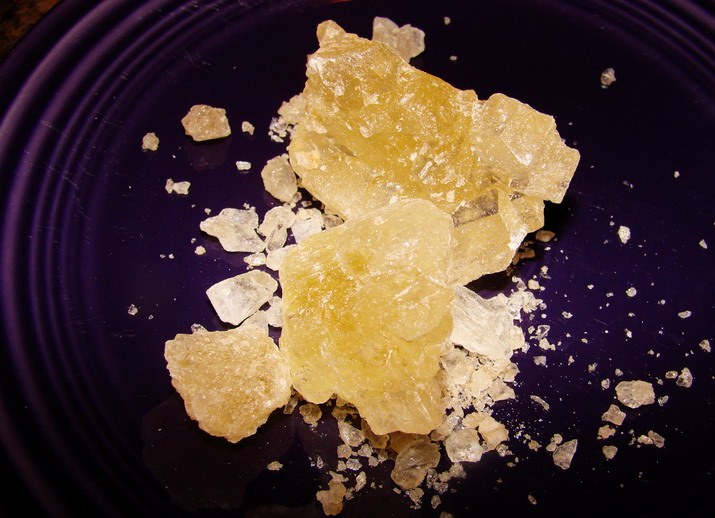
Rock Sugar: Rock sugar, also known as crystal rock sugar or rock candy, is made from a solution of white sugar, brown sugar, honey and water, brought to a boil. The syrup is allowed to crystallize, and it forms beautiful lumps of yellowish sugar candy which look rather like rough citrine gemstones. Rock sugar is used as a flavoring agent in braised dishes, primarily red cooked dishes from southern China, but it isn’t just a sweetener. The flavor is unique, in that it partakes of both the flavors of brown and white sugar, and the fragrance of honey, but it can be approximated by using raw sugar mixed with honey in a recipe.
What cannot be replicated is the beautiful glossy sheen that rock sugar gives to the red-cooked dish’s braising liquid. The sauce, when reduced becomes a shimmering glaze that looks like molten amber glass–it is uniquely beautiful and is well worth the trouble and tiny expense of picking up a small bag of this particular sugar.
To use it, one needs to break up the big crystals into smaller, more usable chunks. You can use a hammer, but I like to just break them up in a marble mortar and pestle. Once they are in smaller chunks, it is simplicity itself to just grind those into a rough powder which will dissolve easily in simmering liquid.
Then you just add it to the braising liquid, and then let the dish bubble away, and it will cook down to create a beautiful, fragrant one pot meal with an incomparably flavored and scented shining sauce.
On of my favorite recipes using rock sugar is the Cantonese Red Cooked Pork With Taro and Sweet Potato.
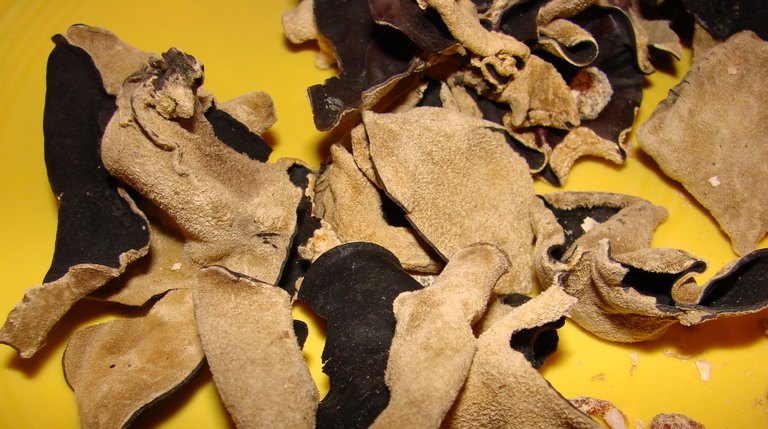
Cloud Ear/Wood Ear/Black Fungus: This unusual ingredient is what is known in China as a “texture food.” The Chinese feel that the texture of a food is just as important as its flavor, scent and color, so there are certain foods which are eaten just because they feel interesting on the tongue, teeth and lips.
Cloud ear fungus is added to dishes not because of its flavor, but because of its unique and interesting texture–it is crisp, slightly rubbery and it squeaks against your teeth a bit when you chew it.
Cloud ear fungus grows on trees, and is dried soon after it is harvested. Its jet black color is a secondary reason it is used–that color can provide contrast with a pale colored meat or brightly colored vegetables in a dish. When you pick up a bit of it while it is dry the black side is smooth and crisp feeling, while the greyish underside has a somewhat flocked texture, like roughly worn velvet.
It must be rehydrated before it is used, an operation which is simplicity itself. All you need to do is cover the fungus pieces with hot water and allow them to soak it up for about ten or fifteen minutes. When it is rehydrated, the fungus expands to be about 2/3 larger than it started out, and the texture changes considerably. The napped grey side loses its softness and the fungus becomes uniformly rubbery and somewhat leathery. Once it has soaked sufficiently, drain away the water–just discard it–it is of no use since the fungus has no flavor, and turn it to the grey side. On the underside, you will find a bunched-up, knotted bit that looks crinkled and has a woody texture. This is where the fungus was attached to the tree. Trim that off with your knife, and then you can cut the fungus in whatever way you like.
Most often used in thin shreds, cloud ear fungus can be found pre-cut into shreds that resemble tiny black twists of leather. Or, you can buy it in larger pieces, and roll each bit into tight cigar-like shapes, then cut them into thin shreds.
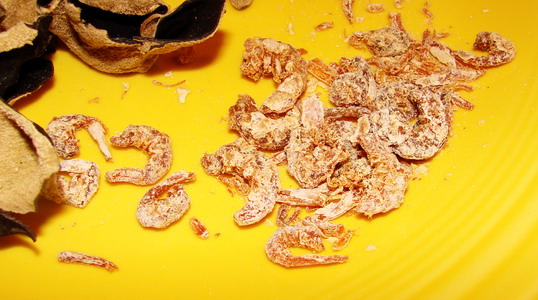
Dried Shrimp or Shrimp Sauce: Dried shrimp are salted, small headless or whole shrimp which have been dried in the sun or freeze-dried. They are pinkish grey to grey, and they smell either briny or slightly fishy. They are sold in cellophane packages, in the dried food section of the market.
You can keep them, double-wrapped, in the freezer or in an airtight cannister in your cabinet. I use them frequently enough, I don’t bother with the freezer option.
They have to be rinsed before use, to remove excess salt, much like the Sichuan preserved vegetable, and they have to be rehydrated, like the cloud ear fungus. Just give them a rinse in cold water, and then soak them in hot water until they soften and become leathery, instead of crispy. Rinse them again, and they are ready to use.
I like to use them in Sichuan Dry Fried Green Beans; they add a wonderful, indefinable savor of the sea to the minced aromatics, and along with the preserved vegetable, they bring a delightful hit of umami oomph. I also like them in the fillings of some dim sum dishes and, ground finely, in some stir fries.
Shrimp sauce is essentially pureed fermented salted shrimp. Lee Kum Kee makes a version of it that is high quality.
This greyish pink paste is very smooth, and very, well–fragrant. It is very strongly scented, and used judiciously, it brings an oceanic flavor to stir-fry sauces. I prefer the more mild flavor of the dried shrimp myself, however, and I find that they keep better in the long run. (And, they make fun kitty snacks. Just toss one to your cat to see them leap and chase after it, pounce upon it and devour it. Such good fun!)
Chinkiang Vinegar: Also known as Chinese black vinegar, chinkiang vinegar is sweet, with a deeply nuanced, slightly smoky flavor. Made from glutinous rice in Chinkiang, in southern China, this vinegar is used in dipping sauces, braised dishes, soups, and in noodle dishes. It is one of the secrets of Sichuanese Fish Fragrant Sauce, known in American Chinese restaurants as “Garlic Sauce,” and it gives a definite tang to some version of Kung Pao Chicken.
The highest quality brand on the market is Gold Plum, which has a yellow, red and gold label and comes in a tall bottle as you can see on the left in the first photograph in this post. It is available in most Asian markets and even in some American grocery stores.
In a pinch, you can use balsamic vinegar in the place of it–the flavors are similar, but not the same. To my taste, the chinkiang vinegar is sweeter and smokier than most balsamic.
It keeps forever, opened, in a dark place at room temperature.
XO Sauce: XO sauce is a fairly new addition to the Chinese pantry: it was invented in the 1980’s among the haute Cantonese chefs in the trendy, bustling Hong Kong restaurant scene.
A sauce made of dried seafood ingredients long prized in Cantonese cookery such as dried scallops (conpoy), shrimp and fish which have been minced or ground up and cooked with chili, onions, garlic and oil, XO takes its name from the designation for extra-old cognac. Cognac was a very popular drink at that time, and was a status symbol, and as such, the designation XO became symbolic of wealth, power and luxury.
XO sauce was once used primarily by chefs, but now it is bottled by several companies, including Yank Sing, Lee Kum Kee and Amoy. I have used both Yank Sing and Amoy and have been impressed with both of them.
XO sauce is very strong in flavor, so a little goes a long way. Used in small quantities along with Shao Hsing wine, soy sauce and sesame oil, it can impart a mysterious richness to a stir fried dish, particularly one containing a sensually textural vegetable like eggplant or a delicately flavored seafood like freshwater shrimp.
Once the jar is opened, I keep it in my fridge, and so far, it seems to keep forever.
Thick Soy Sauce: Thick soy sauce is a dark soy sauce which has had a bit extra wheat added during the fermentation process. During later stages of fermentation, sugar and molasses are added, making the finished product a thick, dark black sauce with a syrupy consistency, which has a pronounced sweetness.
This is what is used in restaurants to give fried rice its characteristic dark brown color and slightly sweet flavor. Most home cooked fried rice dishes are pale, but Americans are used to the dark brown rice dishes from restaurants, so if you want to replicate that flavor and color, go for a jar of Koon Chun thick soy sauce. All of Koon Chun’s labels are similar, blue, yellow, white and red, with Chinese lettering on one side and English on the other. (If you can read Chinese, you will note that the Kun Choon sauce in the photograph at the top of this post is actually hoisin sauce–my thick soy sauce jar had stains from the sauce all down it and was not fit for public viewing. Rather than run out and get another full jar, which I did not need, I used the hoisin sauce jar for the picture instead. Who ever said the camera cannot lie?)
Also useful for coloring other foods, such as gravies, sauces and soups, I find that I have used thick soy sauce in many unexpected places to great effect. It has turned out to be a great kitchen helper, even if I use it “off-label” more often than not. I have also used it in dipping sauces for dim sum as well, and it is good in cold noodle dressings to give an appetizing color and slight sweet flavor.
I must caution you, however, that a little of this sauce goes a long way. It is strong, so use it by the half teaspoon to teaspoon measurement, and go easy on it. You don’t want all of your food to taste sugared or to have a molasses aftertaste.
Once opened, I keep it in the fridge, and it keeps forever.
Those are the ingredients I think would make up a good start towards a well-stocked intermediate Chinese pantry. I am sure there are other condiments, spices, and sauces I could have put on this list, and maybe later, I will add to it. If I do, I promise not to wait six more months before getting around to it!
Morganna: The Adventures of an Ethical Omnivore in Training

I write a lot about my younger daughter, Kat here, and post pictures about every week, but I don’t post as many pictures of Morganna, the elder daughter. In large part, this is because she hates to have her picture taken, and as she is seventeen, and has a bit more energy than I do, she can usually outrun me when she sees the camera coming. However, I do not want my readers to misunderstand what an important part of our household Morganna is, and how often she is in the kitchen with me, prepping, cooking and cleaning by my side. We have fun together, she and I, and that is as important to me as knowing that I am imparting to her important culinary and cultural lessons while we sing, dance and cook in the kitchen, with cats underfoot, friends and family strewn about and a baby at the center of it all.
One thing I wanted to write about to tell everyone is that Morganna went out on Sunday and did something that I think is important for every ethical omnivore to take part in, at least once in their lives, if it is in any way practical for them to do so.
She went to her friend’s farm, and helped her friend kill and butcher the calf she had raised by hand.
I grew up helping my grandparents butcher chickens, cattle and hogs, and can still kill and clean my own fish without blinking an eye, so when Morganna asked if she could go help Celeste, I gave my permission gladly. I think it is important for all meat eaters to know exactly where their food comes from, and if possible, for them to take part in the killing and preparation of an animal for consumption at least once.
Ever since Morganna was a tiny child, I never lied to her about where meat came from, just as I was never lied to by my parents or grandparents. In fact,when I ate any pork or beef from our farm, I knew exactly which individual animal any given bit of meat was from, because we put their names on the labels of the paper we wrapped each cut in before packing it away in the freezer.
To some people, this is macabre, but to me, it is only giving the animal who we cared for, nurtured and then killed and cut up so we could eat it its due: recognizing the life and death of an individual animal by remembering its name as we ate it is a form of giving thanks and respect to that animal.
So, I was pleased that Morganna was willing to help Celeste kill and butcher her calf, and allowed her to go.
She was gone for about seven hours, and when she came back, she told me something that made me doubly proud of her, Celeste, and James, another friend who came to help. The three teens did the entire job themselves.
Celeste’s father loaded the gun which Celeste used to stun the half-grown calf by shooting it in the back of the head. After that, her father stepped back, and the three young people did the rest of the work–and a lot of work it was. Even though the calf was only half grown–it is still a large animal, and required a great deal of muscle.
Celeste gave the killing stroke by cutting the calf’s throat with a very sharp knife: Morganna held the bowl that collected the blood that drained from the carcass. The three of them did the skinning together; Morganna said that even though she had never skinned an animal before, she understood how it was to be done because she had seen me prepare whole tenderloins by trimming the silverskin–it is the same principle entirely. Gutting was accomplished by Celeste and Morganna while James held the hanging carcass still, and Morganna helped disjoint the legs and remove them with sharp knives and pure muscle-power. She once again said she understood how to do it because I had taught her years ago how to break down whole chickens into cooking parts, and the principles are the same–it is just that the joints are bigger in a calf.
When I asked her how she felt about the killing and the butchering, she said it hadn’t bothered her at all. “If the calf had been hurt or afraid or if we had messed up and caused it pain, that would have bugged me,” she said. “But he died fast, and Celeste was careful, so it was okay.” Once the calf was dead and the hard work of butchering started, Morganna was surprised at how much she knew how to do from my descriptions, and the bits I had taught her in the kitchen. “It wasn’t hard–it was a lot of work, but it wasn’t impossible,” she said. “And I did better with it than Anthony Bourdain did–he felt guilty about killing the pig. I didn’t feel guilty at all–it is a cow–it is what you do to eat.”
Anthony Bourdain is her personal hero, and she has read each of his books at least three or four times. Even though she was rightly proud of her ability to help kill a calf without flinching or feeling guilty about it, unlike her hero, I had to point out that she did grow up in a different culture than Bourdain did. He was very definitely a city kid, while she grew up in West Virginia, in a culture that is still very close to the land, and where hunting, farming and butchering are all a vital part of life for many people.
Morganna came home tired and sore, but satisfied, with a small hunk of the tenderloin.

She was too weary Sunday night for me to cook the steak for her, and instead just fell straight into bed to sleep for hours and hours.
Last night, at midnight, Morganna decided she was hungry again, and since I was nursing Kat, she bustled herself into the kitchen and cut the tenderloin into tiny filets, and seasoned them. Then, she put a potato in the oven, and cut some broccoli, onions and garlic up to make broccoli with panch phoron–her favorite green vegetable dish.
When the potato was done, she started browning the onions for the broccoli, and began to heat the cast iron skillet to sear the steaklets. At this point, Kat, who was asleep in my lap in the living room, woke up, her nostrils twitching at all of the good smells.
Morganna’s friend James, who was on the phone with her during this entire process, when told what she was making for a midnight snack, said, “This is what happens when you grow up with a chef in the house.”
Morganna was pleased to eat the fruits of her labor, and I was pleased that she is learning important lessons in where food comes from, and how to process it step by step, from the field to the table.
We are lucky to live in a community which is close enough to the land so my daughters can grow up knowing where their food comes from. They can see firsthand the true cost of food, not just in economic terms, but also in sweat, bone and blood.
They will grow up understanding that life comes from life, and all life comes from the earth and the sun, and to the earth, all life returns, in an endless cycle.
That makes me very proud.
Celeste told Morganna and James that the next time she butchers a calf, they will come and help. I think I will tag along so I can photograph the process and document exactly how one goes about killing and butchering a bovine in a barnyard.
Food in the News: Organic, Ethical and Fast, And a Bit on Bees
I have a lot of food-related news you can use today, from sources far and wide.
First up, a major study from the University of Michigan has found that organic farming has the potential to feed the world, because it can provide up to three times as much food in the same amount of land as conventional agriculture in developing countries. In developed countries, the yields of organic agriculture were comparable to the yields using conventional agriculture.
This is good news for those of us who care about the ecological and human impact of pesticide use on our environment.
National Public Radio featured Barbara Kingsolver, author of Animal, Vegetable, Miracle, on their show, Speaking of Faith, where the topic was “The Ethics of Eating.” There is a lot of material on this link: podcasts of the interview, reader/listener reactions, and a complete transcript of the show. Enjoy!
The New York Times’ Minimalist, Mark Bittman, brings us 101 ideas for eating at home fast, without resorting to fast food or takeout. He promises that these “recipelets” take ten minutes or less each, but, after having read them, I rather doubt that. Some of them look more like they would take twenty minutes or so–but really, what is a minute or two or ten between friends?
His ideas are still useful and good for those who are in a hurry to feed themselves, their friends or –gasp– their families nutritious food that doesn’t require hours to prepare. In other words, the article is a great boon to parents and other busy folks who still care about good food.
Finally, here is an article about the possibility of an Asian bee parasite being at least partially behind the mystery of colony collapse disorder.
Thank you to Heather for pointing out the NPR story to me.
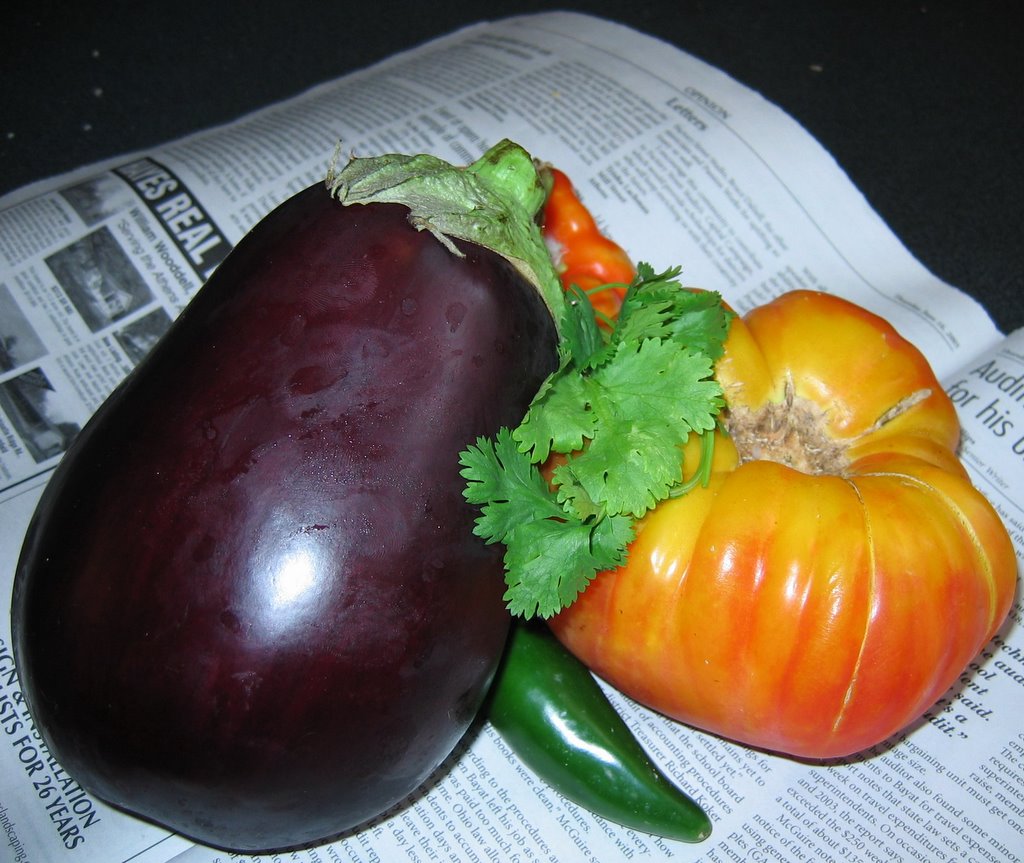
Making Baby-Safe Curries the Whole Family Will Love

As regular readers have probably already gleaned, Kat has an amazingly open mind (and mouth) when it comes to solid foods. I did try, sort of, to introduce the foods suggested by typical American baby books and pediatricians to Kat: rice cereal, bananas, and other bland fare, but she just really didn’t much care for them.
It makes a great deal of sense; when I was pregnant with her, I ate a steady diet of curried vegetables and spicy dals, along with very spicy stir-fried greens and tofu. After she was born, I was told while she was in the hospital by the nutritionist that since I was breastfeeding, I had to be careful what I ate, since babies’ stomachs were sensitive to what Mom ate. After she left the room, two pediatricians, one from China and one from somewhere on the Indian subcontinent, came up to me and said, “She isn’t right about that, you know. Eat what you like. Where we are from, mothers eat what they always eat, and it is never bland or lacking in garlic–and the babies are fine.”
I am happy to report that some American pediatricians are coming around on the issue of feeding babies spicy foods. Here is a great article pointing out that a lot of the “baby food rules” that we American parents have been fed all these years are not based on science, but rather guesswork and cultural bias and may not only be wrong but somewhat harmful.
I was particularly interested by this quote from the article: “Dr. David Ludwig of Children’s Hospital Boston, a specialist in pediatric nutrition, says some studies suggest rice and other highly processed grain cereals actually could be among the worst foods for infants.’These foods are in a certain sense no different from adding sugar to formula’ and could contribute to later health problems, including obesity, he says.”
I wondered about that myself when I first fed Kat rice cereal. It wasn’t exactly what one could call a whole grain–and since adults aren’t suppose to eat such highly refined grains, why are they so good for babies? Foods like that which are basically pure starch do have as high a glycemic level in the body as sugar, so I was skeptical. But, I did give it to her, oh, about twice–mainly because she really didn’t much like it.
So, Kat has been eating curries: Indian, Thai, Sri Lankan, and other spicy dishes from China to Mexico and all points in between second hand since she was conceived. And she seems to be fine.
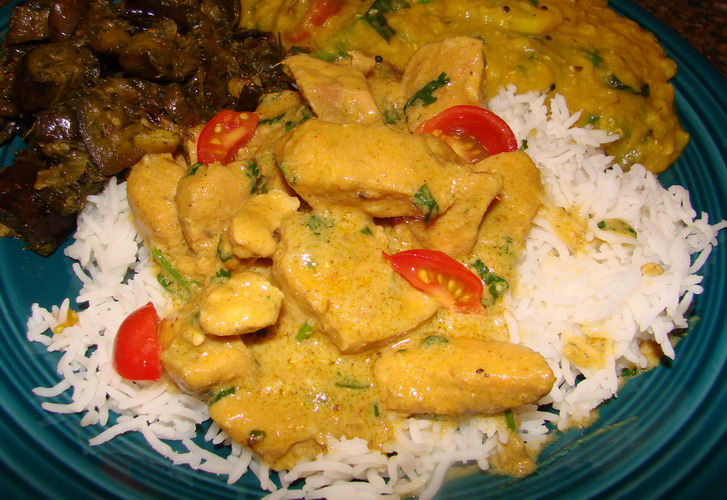
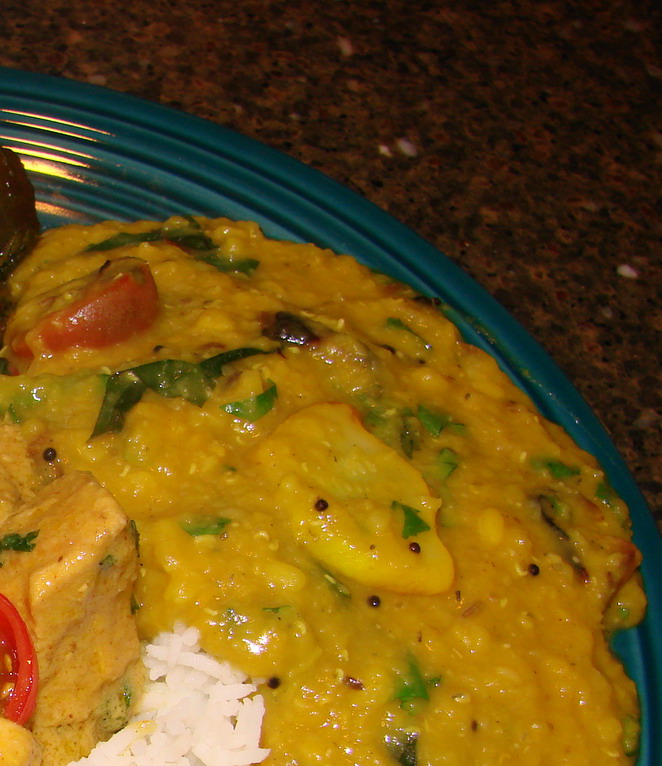
As you can see from the photo above, she is growing like a weed, and has started building some nice long (and strong) legs. And she is healthy and happy. And she still really doeasn’t care for bland food, so now that she is able to eat meats, I decided to make some chicken curry she could enjoy with us–essentially baby-safe curry.
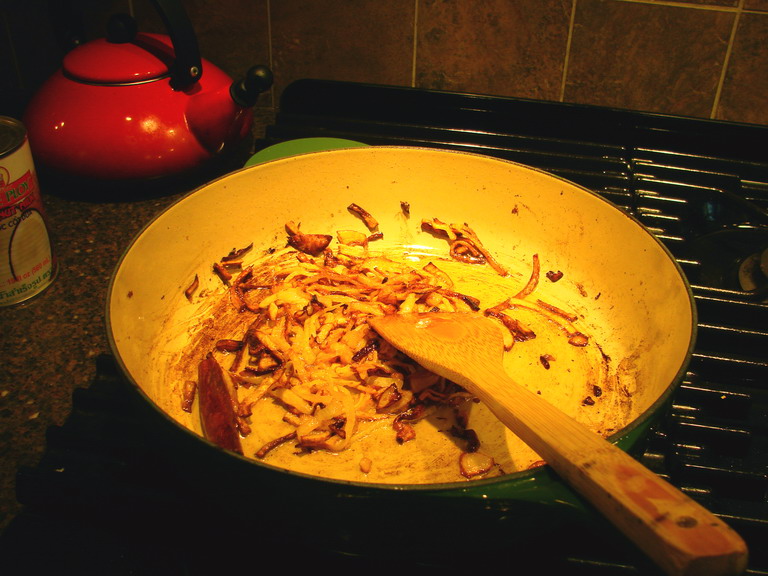
What does baby-safe curry consist of? Well, I tend to use less chilies than I usually do, because Kat hasn’t caught up with us when it comes to the truly hot stuff. I don’t like to use dairy in her curries, though yogurt would be fine, so I tend to make them based on coconut milk. Which is fine–the fats in coconut milk are reputedly good for babies, being as it is very digestible. I also tend to use a good amount of very browned onions, garlic and ginger, which I have ground to a paste, in her curries: not only do they add flavor and color, they add healthy nutrients as well. The sulfur compounds in onions and garlic are quite healthy and have antibiotic properties, and the ginger helps aid digestion.
I think it is best avoid tree nuts (and oils made from them–in this curry I used the cream from the coconut milk as cooking oil, but I could have used canola oil, too, or ghee), peanuts, milk or cream and other highly allergenic substances, but everything else is fair game. That means no korma for Kat for a while, but there are plenty of other curries, based on coconut milk, tomatoes, or tamarind, that she can have.
The spices I like to use for Kat include cinnamon, fennel, cloves, coriander seeds, a tiny bit of black pepper, green cardamom pods and a little bit of fenugreek seeds. I carefully grind them all to a powder, and mix them with the pureed browned onions, ginger and garlic, so that there are no lumps in the curry she could choke on. All of these spices have health-improving qualities, and they all tend to have a gentle, sweet flavor profile, especially when combined carefully together. The pepper and fenugreek are the exceptions, and their bite and slight bitterness add depth to the masala. The mixture comes out quite flavorful–but not overpoweringly hot. A curry flavored with this masala is wonderfully fragrant, and gentle with a nurturing quality that I quite like.
Finally–I do use a bit of dried cayenne chile, some paprika and turmeric, all fully ground into a powder, to add the final flavoring and color to the curry. I don’t like my curries to be technicolor productions, but I do like them to have some appetizing color, and the turmeric and paprika take care of that, while the turmeric also adds its own antiseptic qualities, and the chile adds zing.
That is all. I think that my feelings on making curries for a baby are this: whatever the baby likes, use it. Go easy on the spices–but don’t be afraid to use them, especially if you have been eating them all through pregnancy and nursing. Your baby is probably already used to tasting them, and will note their lack if you restrain yourself too much. Just make sure to grind your spices well, and make certain that they are all cooked carefully before the baby eats them. Raw spices are awfully hard on any digestive system.
If by chance you make the curry too strong, you can always add more yogurt or coconut milk to tone it down a bit.
Whatever meat you use, if you give your baby meat, make certain it is fully cooked, and can be ground into a puree for the wee toothless ones. I used chicken breasts from locally raised organic free-range chickens, and while these birds were well-exercised and the meat was firm and somewhat tough (and very tasty) it ground up perfectly fine after it was cooked in our Sumeet grinder.
Of course, we folks with full dentition ate ours in chunks and chewed it, but it was nice to make one dinner for all of us. All I had to do was grind up Kat’s portions and we were all together at the table eating the very same meal.
And Kat loved it–she felt like she was part of the action, and she didn’t feel like she had to cadge food off my plate, once she found out we were all eating the very same thing.
I loved it because I didn’t have to make two meals, and because I could grind up extra and freeze it for days when we wanted to eat something inappropriate for Kat, like something with seafood or tree nuts or the like.
And Morganna liked it because she got to ask me if baby curry is made from real babies.
It makes her feel a bit like Wednesday Addams when she says things like that.
Kat’s Chicken Curry
Ingredients:
19 ounce can Mae Ploy Coconut Milk
2 cups thinly sliced yellow onions
1 teaspoon salt
1 cinnamon stick
1″ cube fresh ginger, peeled and minced
4 large cloves fresh garlic, minced
4 whole cloves
5 green cardamom pods
1 tablespoon coriander seeds
1/4 teaspoon fenugreek seeds
1/4 teaspoon black peppercorns
1/2 teaspoon fennel seeds
2 teaspoons turmeric
1 teaspoon paprika
1/8 teaspoon ground cayenne pepper
1 pound boneless skinless chicken breasts, cut into 1/2″ cubes
salt to taste
1/2 cup fresh cilantro leaves, roughly chopped
handful of quartered cherry tomatoes for garnish
Method:
Scrape about 4 tablespoons of coconut cream off the top of the can of coconut milk. Melt it in a heavy-bottomed deep pan over medium heat. Add onion slices, and sprinkle with salt. Add cinnamon stick, and cook, stirring continually until the onions are medium brown. Add the ginger and garlic and keep cooking, stirring, until the onions are dark reddish brown and fragrant.
Scrape the contents of the pan, including half the cinnamon stick (discard the other half), into a spice grinder and add other spices. Grind all into a thick, dark reddish brown paste.
Heat the rest of the coconut cream in the pan until it melts. Brown the chicken cubes well. When they are half browned and half still pink, add the masala paste, and cook, stirring, until the chicken is brown and the spice paste is fragrant. Add the rest of the coconut milk, and stir well. Turn the heat down and simmer until the chicken is completely cooked through.
Add salt to taste, and stir in cilantro leaves and cherry tomatoes just before serving.
For a baby, puree the chicken and sauce together and thin with a little bit of coconut milk or water before serving.
Masoor Dal With Baby Vegetables
When I was a child, I had a fascination with little things.
I collected miniature figurines of animals, and my favorite dolls were tiny–small enough to fit in my palm. On the shore of Lake Erie on visits to my aunt and uncle’s home, I would collect the shells of tiny bivalves and snails, delighting in their jewel-like colors and perfection of form in packages smaller than my pinkie fingernail. I rejoiced in the flowers of chickweed–they look like a cross between wee daisies and stars–and when my Mom would pull the weed from the garden, I would sneak behind her and plant it back, all for the sake of the pretty flowers.
As I became older, I began creating miniature landscapes inside of blown-out eggshells and creating dollhouse furniture in 1/12th scale, including plates of food made from plasticine clay.
So, it should come as no surprise to anyone that I should love and adore “baby” vegetables.
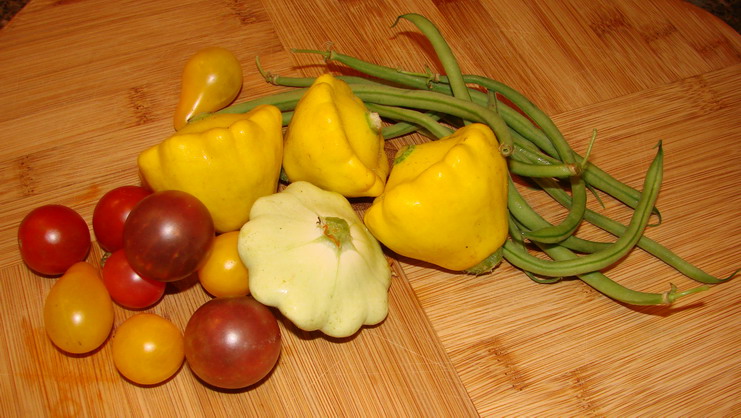
Whether they are true baby vegetables which are harvested very early, as in the case with squash, beets, potatoes and carrots, or if they are naturally small in size when fully grown, such as cherry tomatoes and haricot vert, I have a soft spot in my heart for the perfection of form and flavor of tiny, tender vegetables.
(I have to admit that my favorite baby vegetables to look at are the little pattypan squashes pictured above. They look like miniature UFO’s and I used to fly them around Morganna’s head when she was little. I figure I will do the same silly thing with Kat, as she gets big enough to know what a flying saucer is….Yeah, I am silly.) But, aren’t they cute?)
I like to eat these little gems raw or barely cooked in salads and pasta dishes, but I have also found that they add a great deal of flavor and color to my usual Indian lentil dish made with masoor (split and hulled lentils–also known as pink lentils) and mung (split and hulled mung beans) dal, seasoned simply with a tarka of onion, garlic, cumin and mustard seeds. With a final sprinkling of roughly chopped cilantro leaves, this dal is a very delicious, nutritive vegetarian summer dish.
I used to make this exact dal for my Pakistani and Bangladeshi personal chef clients in Maryland, almost every week in the summer because they kept requesting it. Sometimes, I would add browned cubes of boneless skinless chicken thigh meat to the dal, so that they could combine it with rice and raita and make a complete meal, a very simple lunch or light supper.
I like it myself without the chicken, but you can add it if you want to.
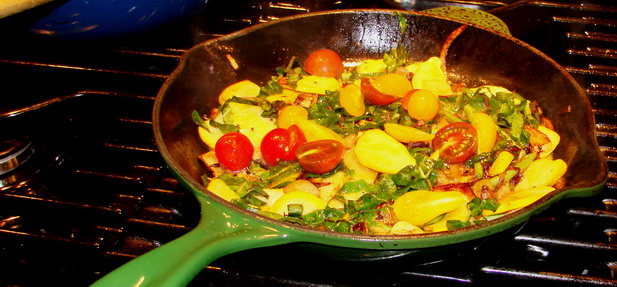
The trick to getting the most flavor from the vegetables is to add them to the tarka and allow them to brown on the outside, forming wonderful caramelized flavors.
A tarka is simply made: all it is is cooking seasonings deeply in oil or butter until they are well browned and toasted, and then pouring this very fragrant mixture over the dal and stirring it in right before it is served. This action is also called “tempering” in some Indian cookbooks, and is the secret to really great, intense flavors in many recipes.
My general method to make a tarka is to brown onions in ghee, butter or canola oil until they are a medium golden brown color. At that time, I add thinly sliced garlic and fresh chilies, and my spices–usually mustard and cumin seeds–to the pan. I keep cooking and stirring until the onions turn deep reddish brown, the garlic is golden, the mustard seeds have popped and the cumin seeds have turned dark brown and everything is fragrant. Then, I stir the contents of the pan into the dish for which they are intended–in my case, usually a dal.
Sometimes I add curry leaves or dried chilies, and sometimes other spices go in as well. In the case of this dal, I also add the baby vegetables, but they go in after the garlic has turned pale golden. The reason for this is because they release a good amount of water, which slows down the browning process of the garlic and spices, so to make up for it, I cook them just a little bit longer before adding the vegetables.
In this recipe, I also added some thinly shredded chard greens, as I had them on hand. Baby spinach would work just as well and would keep the baby vegetable theme intact; however, as hot as this summer has been, all of the spinach has bolted and gone to seed. We won’t see any more spinach, baby or otherwise here in Athens until the cool weather of autumn swoops upon us.
Kat really loved this dal. I ended up pureeing the leftovers and freezing them for her to have on nights when we are eating foods which are inappropriate for her–such as rare meats, or for her lunches, when we are eating peanut butter and jelly sandwiches. Morganna liked it as a variation on my usually masoor dal tarka, and liked the way the vegetables added extra color, texture and flavor to the essentially pureed golden lentils.
Masoor Dal with Baby Vegetables
Ingredients:
2 cups masoor dal, sorted for stones and foreign objects, and rinsed
1 cup mung dal, sorted and rinsed
1 tablespoon ground turmeric
1/2 teaspoon asafoetida (also known as hing) powder (optional, but I always use it)
1 tablespoon grated fresh ginger
water as needed
3 tablespoons ghee, butter or canola oil
1 cup peeled and thinly sliced yellow onions
1/2 teaspoon salt
3 cloves garlic, peeled and thinly sliced
1 green cayenne chili, thinly sliced (optional)
1 tablespoon brown mustard seeds
1/2 tablespoon cumin seeds
3 baby pattypan squash,ends trimmed and thinly sliced
12 cherry or pear tomatoes, halved
1 handful of haricot vert (tiny french filet green beans) or regular green beans, topped, tailed and snapped into 1″ lengths
1 cup shredded chard or baby spinach leaves
1/2 cup roughly chopped cilantro leaves
salt to taste
Method:
Put dals, turmeric, asafoetida and ginger into a pot, and add enough water to cover the legumes by about two inches. Put on medium heat and bring to a boil, turn heat down to low and cook, stirring now and then, until the lentils soften and break down into a thick puree.
Make the tarka: in a heavy bottomed skillet–cast iron is preferable, heat ghee, butter or oil on medium heat. Add the onions in a thin layer on the bottom, sprinkle with the salt and cook, stirring until the onions turn a medium golden brown. Add the garlic, cayenne chile, and the whole spices. Cook until the garlic is pale golden, the onions have darkened to brown and the mustard seeds have popped. Add the squash, in as close to a single layer as you can manage, and cook until it browns on one side, then turn it over, and add the rest of the vegetables. Turn the heat up and cook, stirring until the rest of the squash is lightly browned, the garlic is fully dark gold, the onions are dark reddish brown and there are browned spots on the beans and tomato skins.
At this point, pour the tarka into the finished dal and stir in the chopped cilantro. Taste for salt and add as needed. Serve immediately with rice and raita for a complete simple Indian vegetarian meal.
For really nutritious baby food, puree and freeze in ice cube trays. Thaw each serving in the fridge and reheat carefully in the microwave. Thin with water or yogurt if needed.

Categories:
- Admin (rss) (55)
- Blogs and Blogging (rss) (81)
- Book Reviews: Cookbooks (rss) (43)
- Book Reviews: Non-Cookbook Food Books (rss) (38)
- Cats and Cat Blogging (rss) (47)
- Chinese Cooking Lessons (rss) (32)
- Culinary School Stories (rss) (18)
- Dairy Pruducts: Cultured and Barbaric (rss) (4)
- Documentary Filmmaking (rss) (1)
- Essays, Rants and Reflections (rss) (260)
- Fighting Hunger (rss) (12)
- Food and Kids (rss) (45)
- Food in the News (rss) (126)
- Food Media (rss) (98)
- Food Preservation (rss) (18)
- Food Safety (rss) (45)
- Gardening (rss) (30)
- Herbs and Herb Blogging (rss) (20)
- Holidays (rss) (50)
- Kat Blogging (rss) (22)
- Kitchen Science (rss) (36)
- Leftover Makeover (rss) (8)
- Life, the Universe and Everything (rss) (131)
- Local and Sustainable (rss) (227)
- Local Athens Food and Foodies (rss) (42)
- Meatless Mondays (rss) (32)
- Menu For Hope (rss) (5)
- Nutrition, Diet and Health (rss) (84)
- On The Farm (rss) (8)
- Recipes: Almost Vegetarian, Vegetarian and Vegan (rss) (294)
- Recipes: American Regional (rss) (37)
- Recipes: Appalachian Hillbilly (rss) (33)
- Recipes: Bread, Pasta, Grains (rss) (95)
- Recipes: Canning and Preserving (rss) (8)
- Recipes: Chinese (rss) (123)
- Recipes: Comfort Food (rss) (120)
- Recipes: Cookies (rss) (16)
- Recipes: Desserts (rss) (48)
- Recipes: French (rss) (25)
- Recipes: Fruits and Vegetables (rss) (302)
- Recipes: Greek, North African and Middle Eastern (rss) (31)
- Recipes: Indian (rss) (137)
- Recipes: Italian (rss) (42)
- Recipes: Japanese (rss) (7)
- Recipes: Jewish (rss) (4)
- Recipes: Korean (rss) (6)
- Recipes: Meat, Poultry and Fish (rss) (220)
- Recipes: Mexican/Native American/ Latin American/Caribb (rss) (27)
- Recipes: Original (rss) (108)
- Recipes: Thai (rss) (27)
- Recipes: Tofu (rss) (17)
- Recipes: US Regional (rss) (16)
- Recipes: Vietnamese (rss) (8)
- Restaurant Stories (rss) (28)
- Sewing, Quilting, Arts and Crafts (rss) (16)
- Simple Chinese Recipes (rss) (30)
- Slow Food and Heritage Foods (rss) (10)
- Spice Blogging (rss) (44)
- The Chinese Cookbook Project (rss) (14)
- The Chinese Pantry (rss) (39)
- The Documentary (rss) (2)
- The Kitchen Saga (rss) (17)
- The Locavore's Bookshelf (rss) (15)
- The Unsung Adventures of The Culinary Nerd (rss) (6)
- Tools and Toys (rss) (35)
- Uncategorized (rss) (10)
- With a Side of Politics (rss) (48)
Archives:
- August 2012 (9)
- July 2012 (12)
- September 2011 (3)
- August 2011 (7)
- July 2011 (8)
- June 2011 (16)
- May 2011 (17)
- April 2011 (11)
- December 2010 (9)
- November 2010 (5)
- February 2010 (1)
- December 2009 (5)
- November 2009 (7)
- October 2009 (10)
- September 2009 (16)
- August 2009 (14)
- July 2009 (14)
- June 2009 (7)
- May 2009 (17)
- April 2009 (10)
- March 2009 (25)
- February 2009 (13)
- January 2009 (10)
- December 2008 (5)
- November 2008 (5)
- October 2008 (6)
- September 2008 (13)
- August 2008 (8)
- July 2008 (11)
- June 2008 (18)
- May 2008 (13)
- April 2008 (14)
- March 2008 (16)
- February 2008 (17)
- January 2008 (19)
- December 2007 (25)
- November 2007 (18)
- October 2007 (24)
- September 2007 (16)
- August 2007 (15)
- July 2007 (15)
- June 2007 (10)
- May 2007 (14)
- April 2007 (16)
- March 2007 (17)
- February 2007 (20)
- January 2007 (13)
- November 2006 (1)
- October 2006 (8)
- September 2006 (14)
- August 2006 (25)
- July 2006 (30)
- June 2006 (28)
- May 2006 (34)
- April 2006 (29)
- March 2006 (24)
- February 2006 (30)
- January 2006 (38)
- December 2005 (40)
- November 2005 (37)
- October 2005 (32)
- September 2005 (25)
- August 2005 (30)
- July 2005 (28)
- June 2005 (21)
- May 2005 (8)
- April 2005 (22)
- March 2005 (17)
- February 2005 (29)
- January 2005 (10)
Search Site:
Links:
- Lily’s Wai Sek Hong
- 101 Cookbooks
- A cat in the kitchen
- A Veggie Venture
- Accidental Hedonist
- Cha Xiu Bao
- chez pim
- Chocolate & Zucchini
- Chopstick Cinema
- Chowhound.com
- Chubby Hubby
- Cook sister!
- Cooking with Amy
- da*xiang
- Eat Local Challenge
- Eating Liberally
- Ecocentric
- Eggbeater
- Epicurious
- Farmgirl Fare
- Fatfree Vegan
- Foodgoat
- ForkandBottle.com
- Green Olive Tree
- Hooked on Heat
- Jaden’s Steamy Kitchen
- Kalyn’s Kitchen
- Lucullian delights
- Mahanandi
- Matt Bites
- MeatHenge
- mmm-yoso!!!
- New York Times – Dining & Wine
- Pizza Goon
- Rasa Malaysia
- Ruhlman
- Sailu's Kitchen
- Serious Eats
- SF Gate: Food & Dining
- Simply Recipes
- Soul Fusion Kitchen
- Tastespotting
- The Amateur Gourmet
- The Cleaner Plate Club
- The Food Section
- The Grub Report
- thecookscottage
- U.S. Food Policy
- Wandering Chopsticks
- Washington Post Food and Dining
- Wasted Food
Meta:

Powered by WordPress. Graphics by Zak Kramer.
Design update by Daniel Trout.
Entries and comments feeds.